
Full Detail and Paint Correction: Ferrari 458 Italia by Todd Cooperider of Esoteric Auto Detail
by Todd CooperiderFor those of you who have been following my work for some time now, you have gotten the opportunity to follow along with me while I perform full details and major paint correction on some of the most beautiful cars in the world: Ferrari! You’ve seen the art of detailing on such Ferrari’s as the powerful 599 GTB, the stunning Challenge Stradale, the ultra-rare 288 GTO, and one of my most popular posts in the Mini-Restoration Detail of a 355 GTS.
What I bring to you today however is quite special: The 2010 Ferrari 458 Italia!
Not only is this particular 458 one of the first to arrive here in the States, but to my knowledge it’s the very first in North America to go through such an extensive and fully documented paint correction detail. My client brought this beauty to me the day after he received it so that I could get it started off correctly and fix the paint issues that typically come from the factory.
Introduction: Ferrari 458 Italia
The 458 Italia is the successor to the popular mid-engined F430 and is much more than a simple makeover! Weighing in at a mere 3042 pounds, the 560HP V-8 motor will propel the 458 from 0-62 mph in a scant 3.4 seconds and reaches a top speed of 202 mph! The 7-speed, double-clutch gearbox is a technical marvel in itself, and the shifts from the paddle shifters happen almost instantaneously (I went for a ride in it and can vouch on this claim). The ride was firm but not harsh by any means, and the stunning interior ranks up there with finishing touches and amenities found in high-end luxury cars. While the shape and overall beauty of the 458 is art to your eyes, the intoxicating sound coming from the exhaust is art to your ears. Ferrari didn’t merely hit a home run on the Italia…they knocked it completely out of the park.
Evaluation:
As I stated previously, my client took delivery of his new 458 on Monday afternoon, and I had it in my possession already on Tuesday morning. We had an open appointment set for months, knowing that the car would need some work when it arrived via air freight from Italy. Before working on it, I was taken for a ride in this technical marvel and all I can say is that it’s everything that the media raves about…and then some! We arrived back at the shop, big smile on my face, and ready for a closer inspection and evaluation of the paint.
Now I’ve worked on enough Ferrari’s to know that they come from the factory in less than stellar condition, so I was prepared for the worst. Many people assume that the more you pay for a vehicle, the better that it would look but that’s not always the case. Many of these low production, hand-built vehicles simply don’t have the quality of paint finish that the mass produced vehicles do…I know that sounds a bit crazy, but it’s reality.
I know that I said that I was prepared for the worst, but when I saw the reality of what I had to deal with, I just shook my head in amazement! The car had been attacked at some point with a high speed rotary buffer with an aggressive wool pad by somebody completely unqualified for this type of work. This is not the first brand new Ferrari that I’ve done with this same affliction, and it’s not the only 458 that has been treated the same way. I know a great detailer in Hungary that has already worked on several of them (Europe received theirs sooner than North America), and he found the exact same issues. I should be completely desensitized to this with all that I’ve seen, but I’ve got so much passion for cars (especially Ferrari!) and for paint perfection that it’s hard for me to simply accept it for what it is. However…Ferrari brings me a lot of business for proper paint correction so I shouldn’t complain too loudly! 🙂
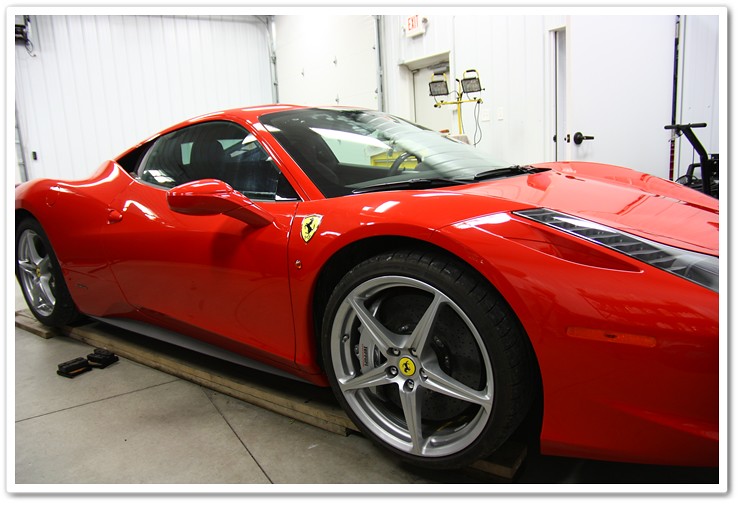
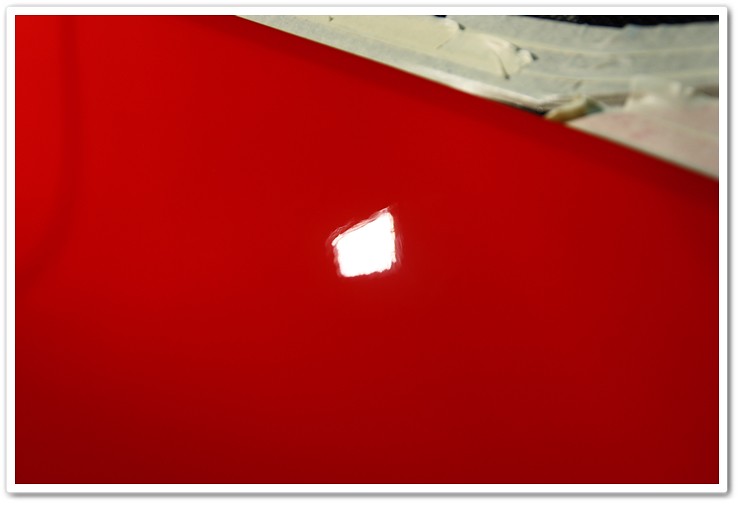
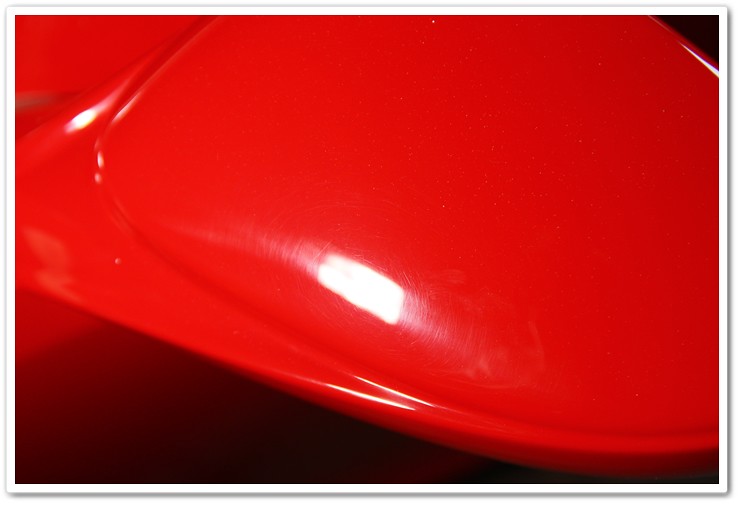
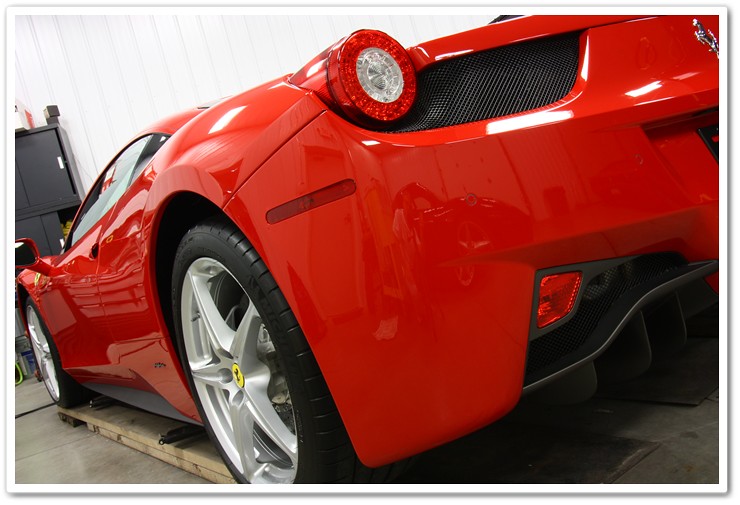
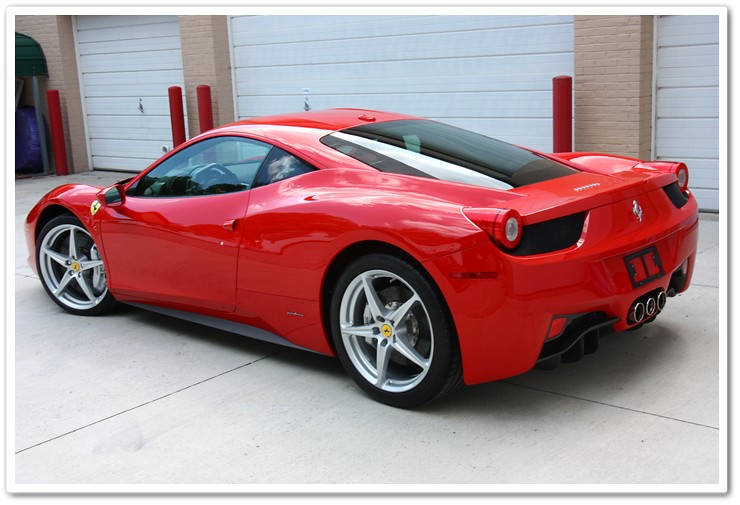
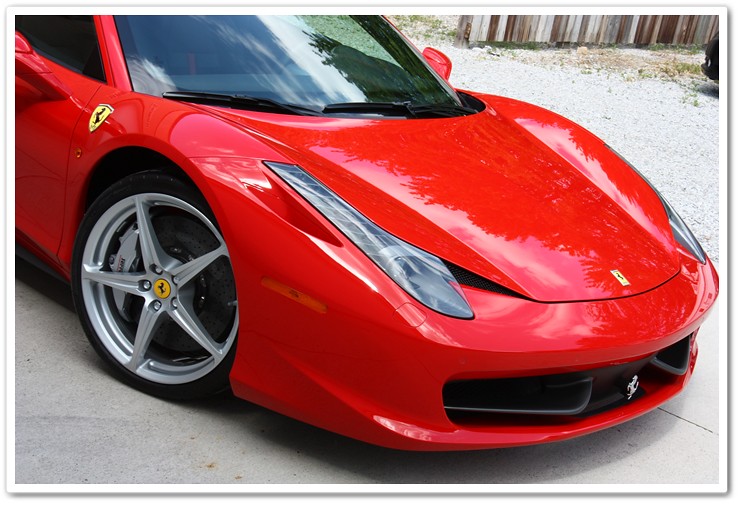
The following shots were actually taken after the pre-polishing prep process (that’s a lot of P’s), but I wanted to show them to you first so you can get a good idea of what we have to work with. You can typically get a pretty good idea on the condition of a vehicle before going through this process, but it’s after you strip any waxes, sealant, glazes, or fillers when you can get a true reading (many of these products hide the actual condition).
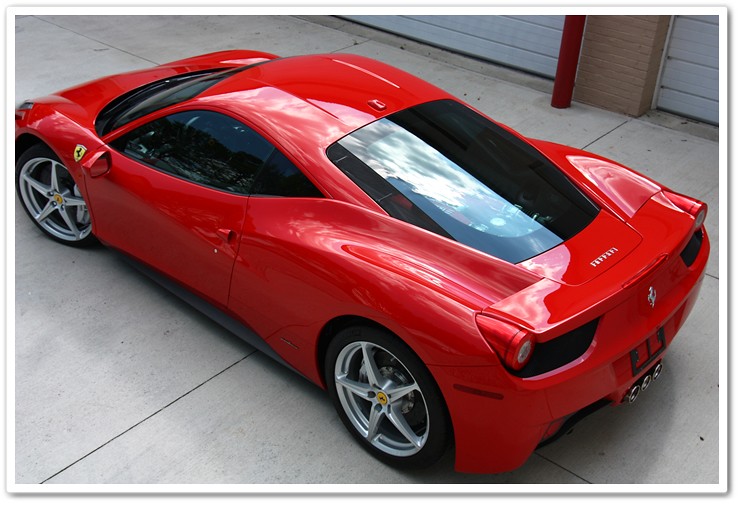
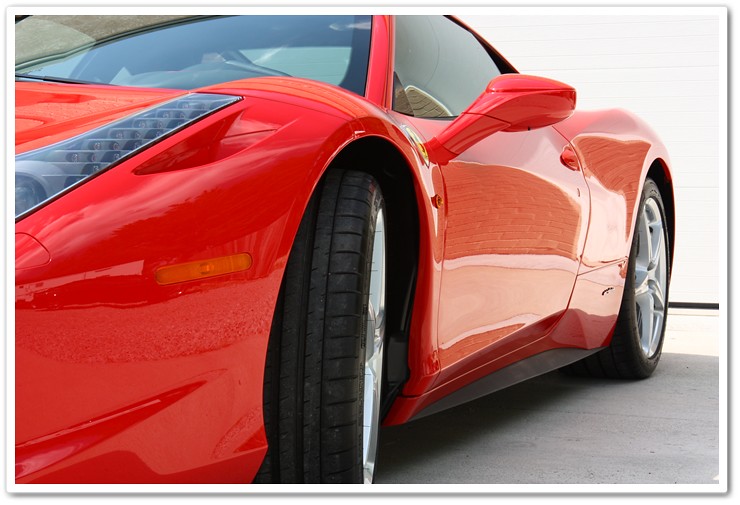
When looking at this photo, you can tell that the car is an absolute beauty and you’d never think that it needed to be “detailed”.
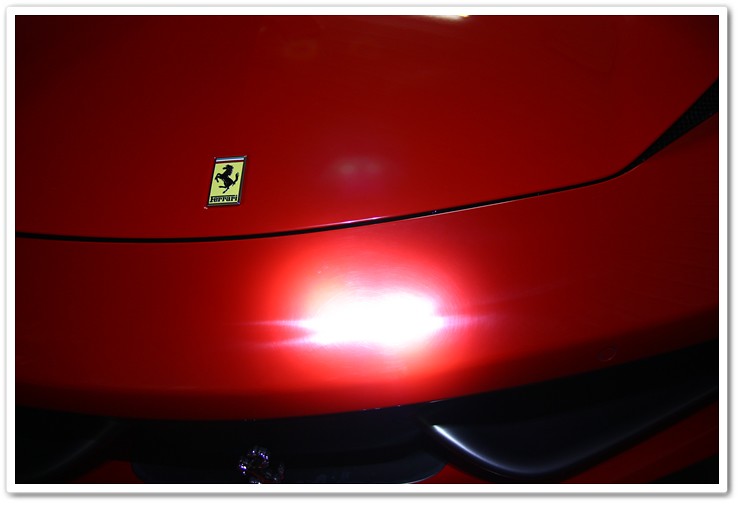
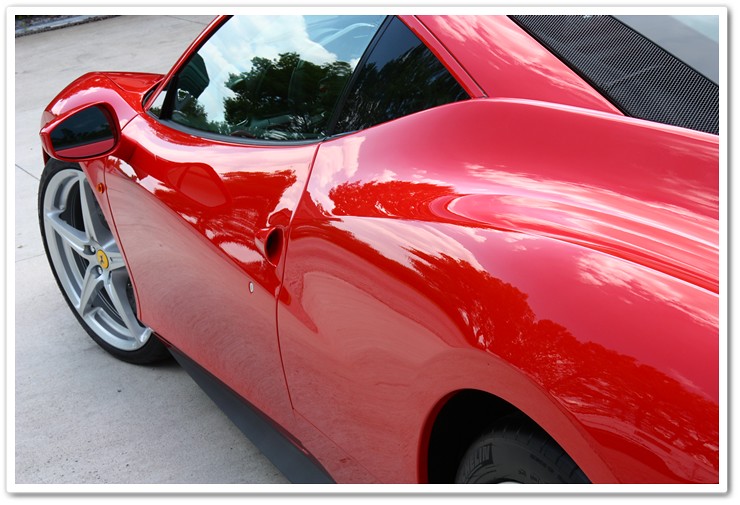
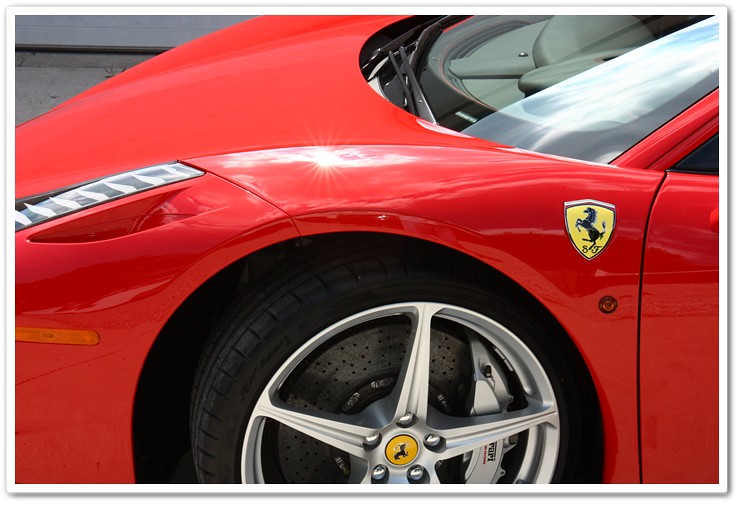
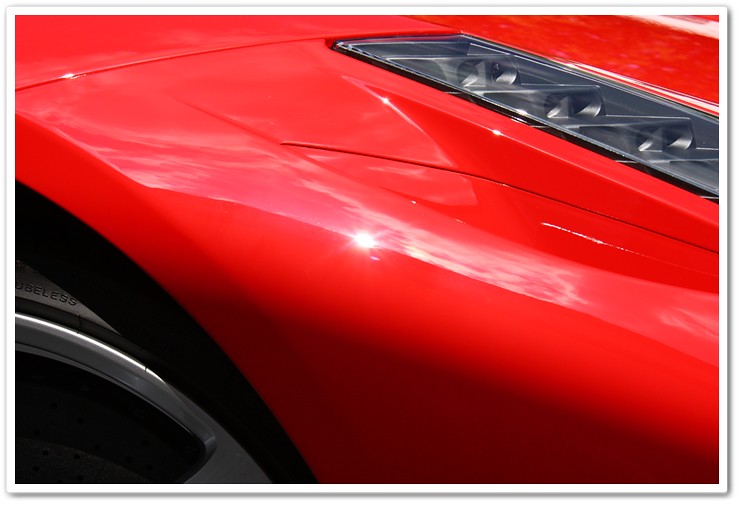
Look how nice this fender is…gotta love that new showroom shine.
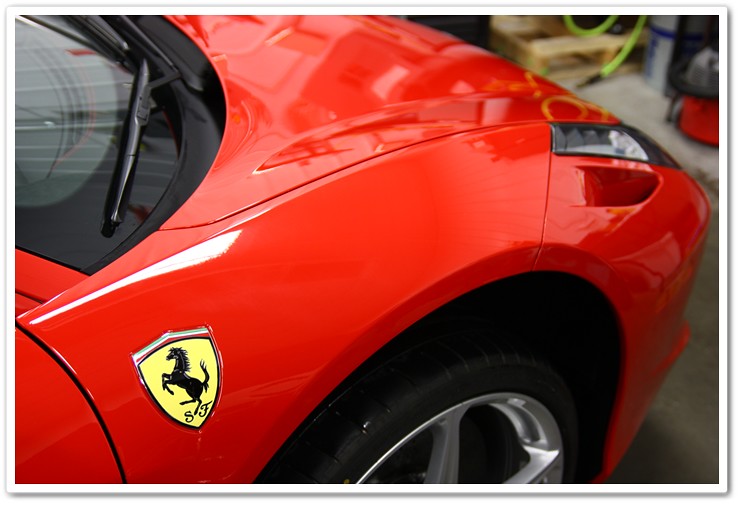
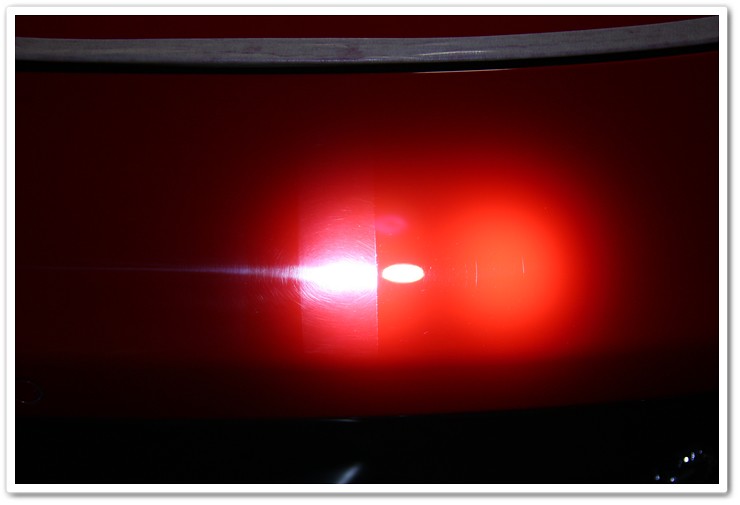
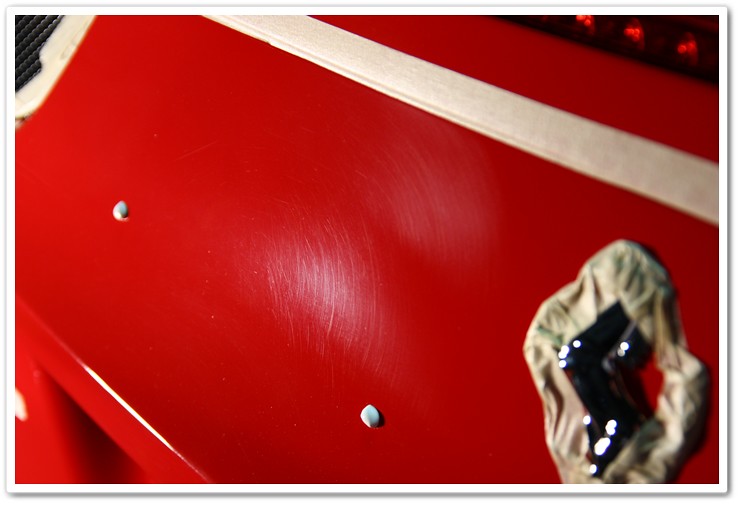
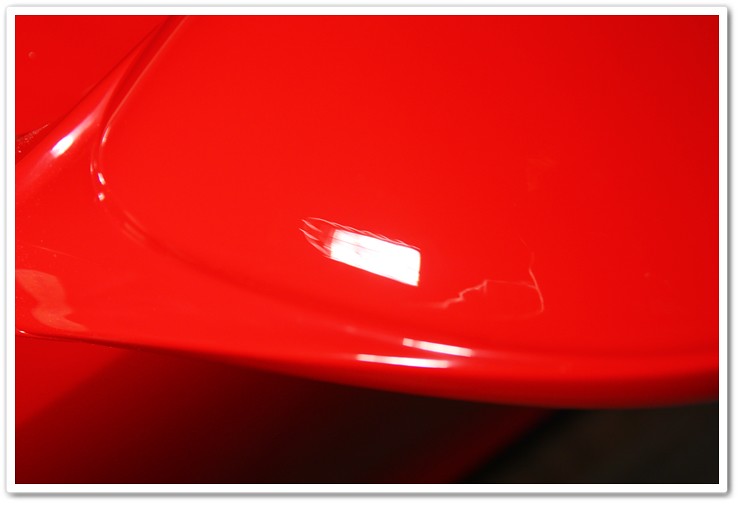
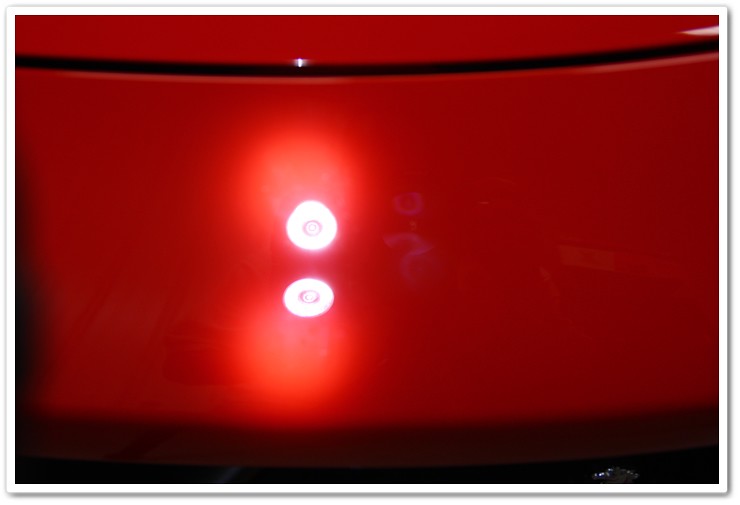
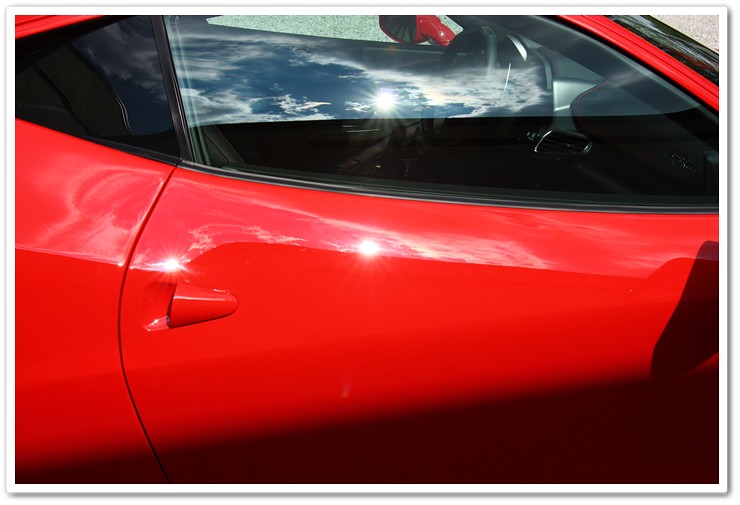
What was that about the beautiful showroom shine? Now let’s take a look at that same fender with my Brinkmann Dual LED paint inspection light. Let me warn you though, the following photos are not for the faint of heart.
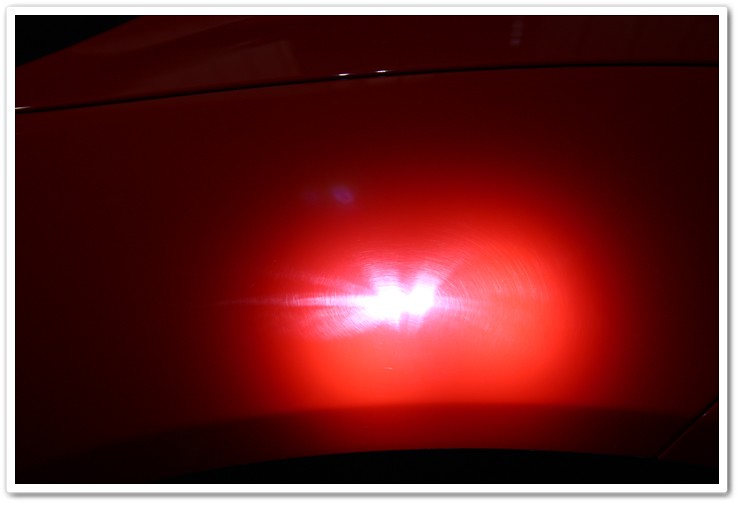
What you see here is what I was referring to earlier…swirls, holograms, and deep scratches left over from overly aggressive polishing / compounding techniques. When you do this, you need to go back with medium and fine polishing steps to clean up the mess that was left from the compounding stage. On a brand new car, or one that has been properly polished, you should only see clear reflections of the light itself. Another way to inspect is to look at the vehicle in the direct sunshine (the light of truth).
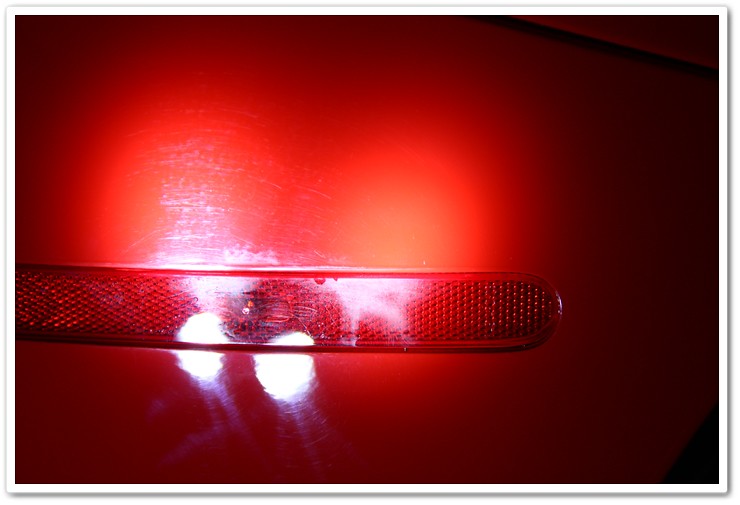
Right rear fender:

This is in the same area as the photo above. The haziness that you see on the lens is paint overspray, indicating that there had been some spot / repair re-painting done after the vehicle was built. I was able to detect the faint blend line above this area (and verified it with my DeFelsko paint thickness gauge), but it was too faint to capture with the camera. Once again this is pretty typical, and doesn’t indicate a problem with this car in particular.
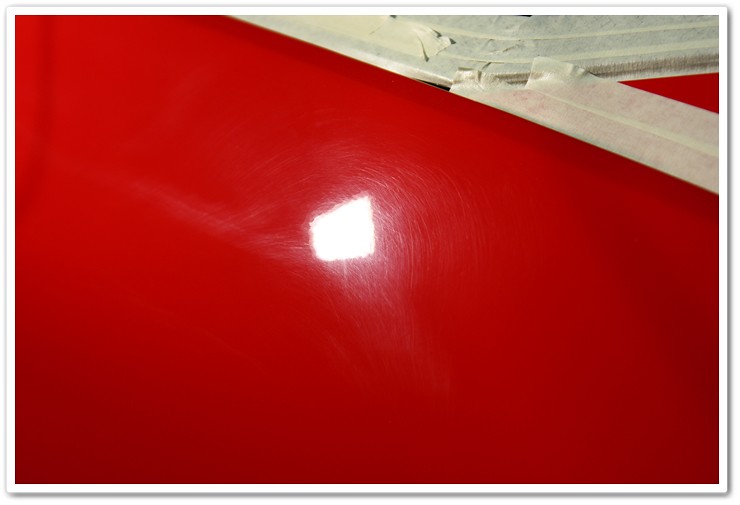
This is on the front bumper, which was one of the more severe areas. As you can see, there’s no direct reflection of the light in this photo.
I could have randomly picked out 30 more places on the car to take the inspection photos, and they would have all looked like the photos above. Sure some areas were better than others, but there were no areas on the car that I would have deemed to be acceptable.
Pre-Polish Preparation:
Before we get into polishing, we need to prep the car to ensure that we have a truly clean surface to work off of. Any previous waxes, sealants, glazes, or embedded contaminants can interfere with the polishing process.
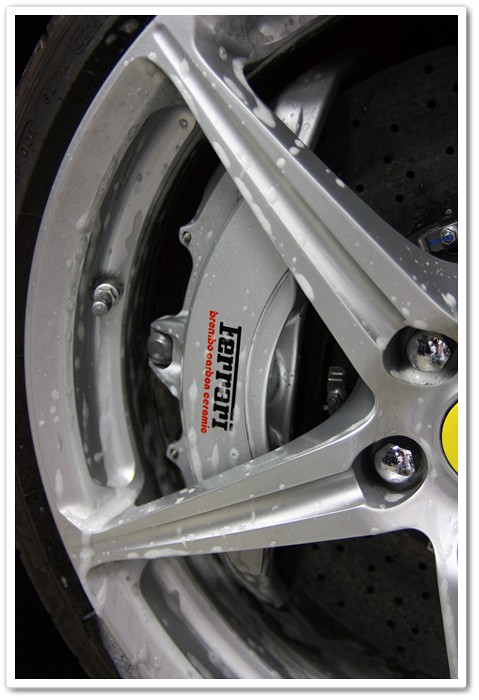
In this shot you will see how well the water is beading. This tells me that there is some kind of protection on the surface that needs to be stripped (glaze, wax, sealant). I saw how bad the condition was even with a concealing product on it, and knew that it would look even worse once it was fully removed.

First up were the wheels. Since this beast comes with Brembo Carbon Ceramic brakes, it’s imperative that we use a very gentle cleaner to prevent any contamination or damage to the carbon rotors. Since I cannot afford to buy a damaged set of them (although they’d look great sitting on my desk!), I chose to go with P21S Wheel Gel.
To get into the deep barrels of the rims, and behind the spokes, I use an EZ Detail brush.

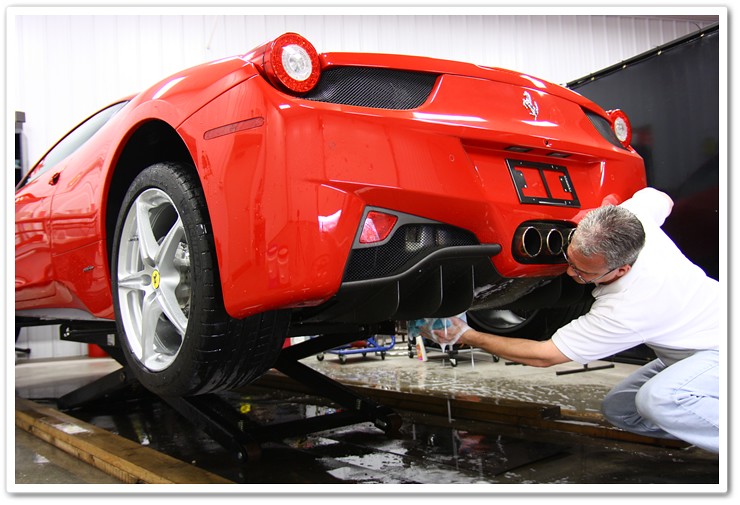
Now that the wheels are done, it was time to move on to the rest of the car. I fully washed it using the Grit Guard 2×4 Method. Here I am pre-soaking the vehicle in P21S Total Auto Wash to help remove any chemicals from the surface. For my wash solution, I used Chemical Guys Citrus Wash & Clear at paint prep ratio.

This is why we call it detailing!
For more information on the washing processes I use, please refer to a few of my reference articles:
- How to Properly Wash and Dry a Vehicle (Without Causing Swirls)
- The Grit Guard 2×4 Wash Method
- How to Detail your Engine Bay
- Exhaust Tip Detailing
- How to Detail your Wheels, Tires, and Wheel Wells
Now that I have the wash process complete, it’s time to further decontaminate the paint surfaces by claying the vehicle to remove any embedded contaminants. Even on a brand new car you’ll be amazed at what the clay will remove from the surface. Here I am using the new DI Fine Clay with Dodo Juice Born Slippy as a lubricant. For more information, please refer to my article on How to Properly Use a Clay Bar.
After claying, I rinsed the vehicle again, dried it off, and taped up all of the trim and any places that have potential for being damaged by the buffer. Here I am using the brand new Meguiar’s Professional Masking Tape designed for automotive use.
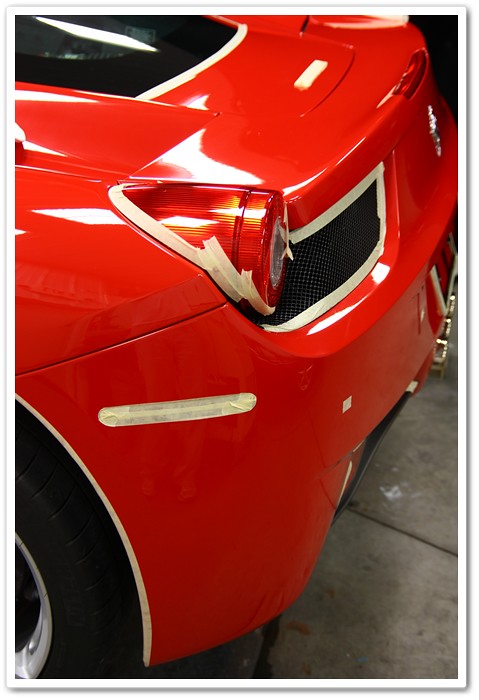
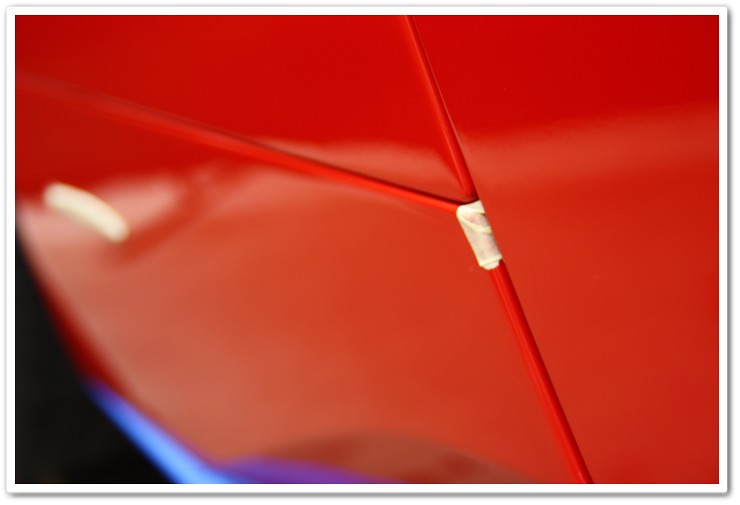
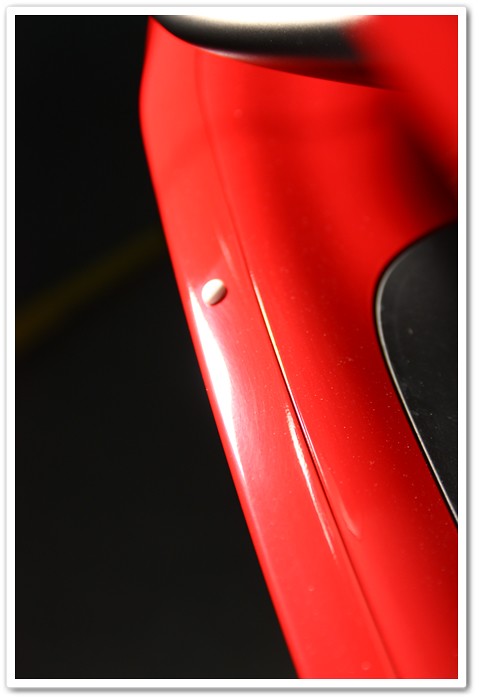
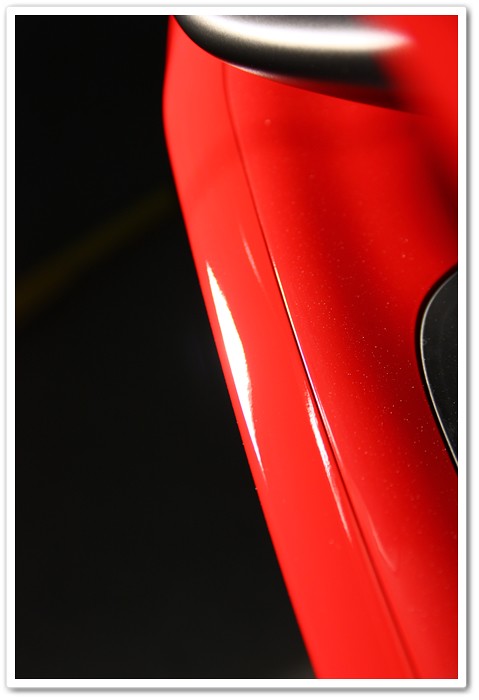
During the washing and claying processes, I’m always looking out for problems or challenging areas that may affect the polishing process. When I saw this point (the taped up part) sticking out on both sides, I thought that they looked like places that could easily be damaged with the buffer if not protected. Unfortunately the person behind the buffer at the factory didn’t think this through the same way I did and burned through the very tip of it on one side of the car (I could tell by the touch-up paint that had been applied to it). So for detailers that will be working on a 458 soon…watch out for these! They’re located just behind the doors (the vertical seem you see), and are part of the panel with the Pinanfarina emblem on it.
The Polishing Process:
The process at the beginning of every detail is to do a test section to figure out what combination of pads, compounds and / or polishes will be required to achieved the desired level of correction. I had heard from my buddy Jesse in Hungary (Apollo Auto) that the 458 paint reacted differently than its predecessor the 430, so I was already expecting a test session to get the system dialed in. For the compounding stage to cut through the heavy defects, I used an Orange cutting pad with Meguiar’s M105 Ultra-Cut Compound. This did a tremendous job, and any remnants were cleaned up in my finishing stage.
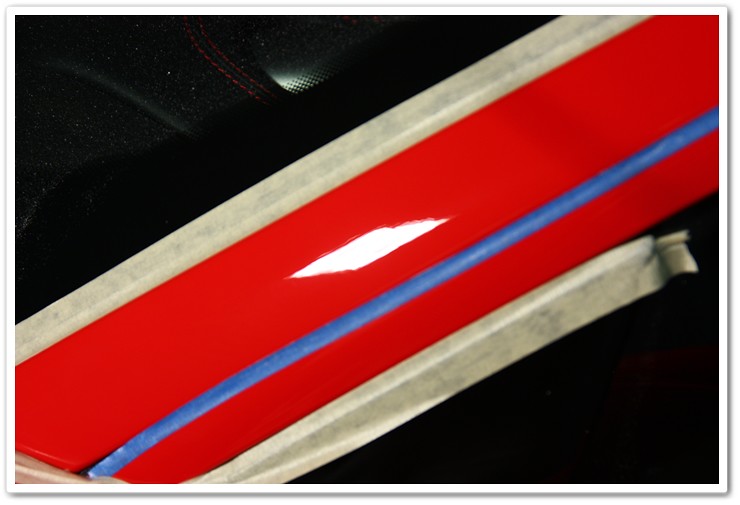
If you look in the photo above, you can see the vertical tape line I am using for my test area. After I polish it I remove the tape to give me a 50 / 50 comparison look at the before and after condition of the paint.
In the photo below, you will see what I came up with after the first trial with M105 / Orange. There are still a few remnants of wool cutting marks (from the factory) in the polished area on the right, but I was able to get them completely cleaned up. When you look at the difference between the left side (un-polished) and the right side (polished), you can see that there will be a tremendous difference in the overall looks of the vehicle when I am finished. When the finish is hazed over from the swirls and defects, it prevents pure light reflection and actually hides the true color of the paint. So if you thought that the very first photo I showed made the car look good, then just imagine what we’re going to end up with when I’m all done with proper leveling and polishing of the paint.
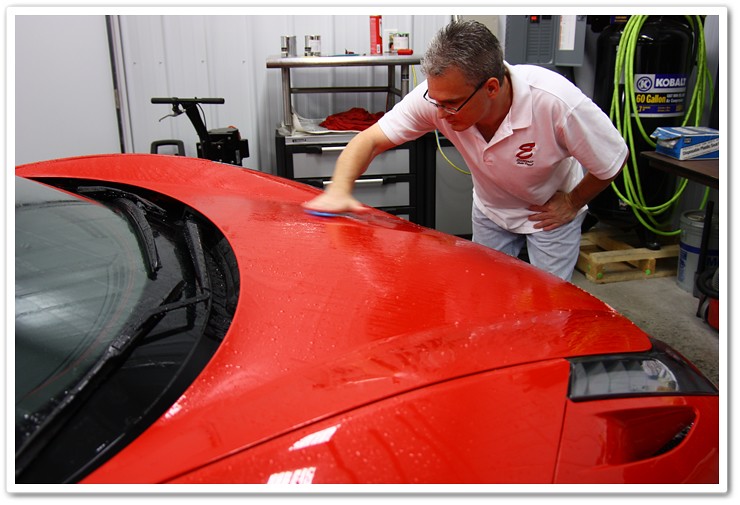
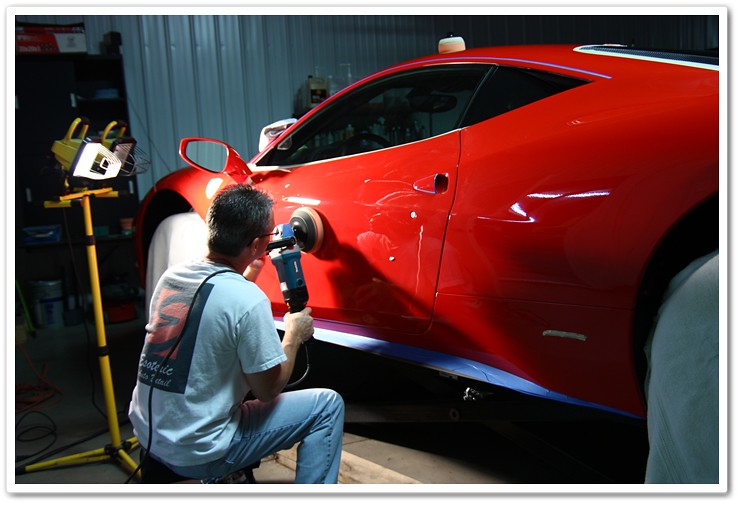
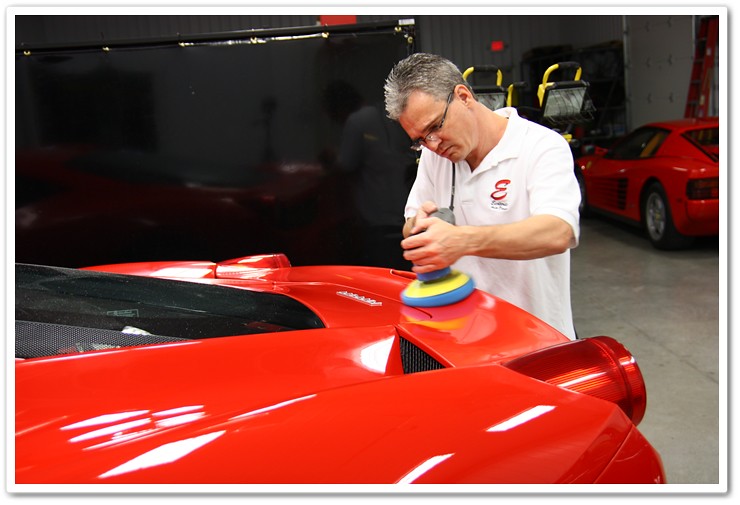
I’ve got my compounding system down, so now it’s off to the races. Here I am working the Meguiar’s M105 with an Orange cutting pad on the Makita rotary ranging from 1200-1500 RPM’s. The keys to successful compounding with M105 are proper pad priming and pressure (regardless of whether you’re using a random orbital or rotary buffer). As you can see, I also prefer to use the Meguiar’s W-66 backing plate which helps tremendously when you’re working on a car with as many curves as Ferrari.
Here I am working on the areas that lead to the big air intakes at the back of the car. These places are quite challenging because of the curvature, and because of the all of the dangerous curves adjacent to them (lots of taping!). I only used the larger 6.5″ pads for the top surface as you see here, and then I had to use the small 4″ spot pads for the majority of the intake. These areas take a tremendous amount of time to do right, and coincidentally they were the areas that received the most wool pad abuse from the factory. On the right side of the car, I switched to a Porter Cable 7424XP buffer with a Surbuf Pad and M105…found it much easier to work with and didn’t need to spend as much time with the 4″ spot pad on the rotary.
At the back of the car, the defects were extremely bad, but I wasn’t able to capture on camera the true severity of it all. Here you can get just a small idea of what I had to work with.
After compounding, you can tell that I restored a tremendous amount of clarity to the paint by removing the heavy wool defects that existed.

Moving around the back of the car, I’m now on the passenger side and working my way forward. This is in the area of the air intake. Once again…heavy defects before.
Afterwards you can see a huge difference in the clarity and color of the paint!
I’m fast forwarding now to the front end of the car. Because of the tight angles, dangerous curves, and small parts that I had to work with (not to mention some of the worst damange on the car), I ended up spending 2 hours just compounding the front bumper alone! Here I am working the small lip at the bottom of the car. For areas like this, it requires lots of patience, and a steady hand.

Before:
And after:
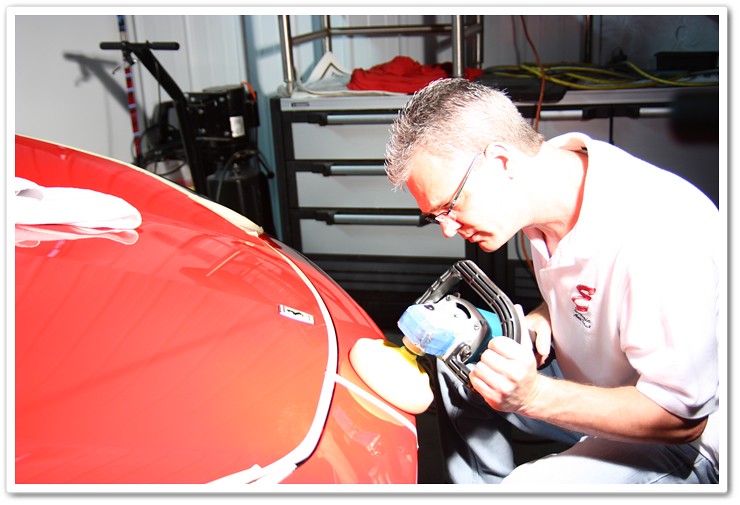
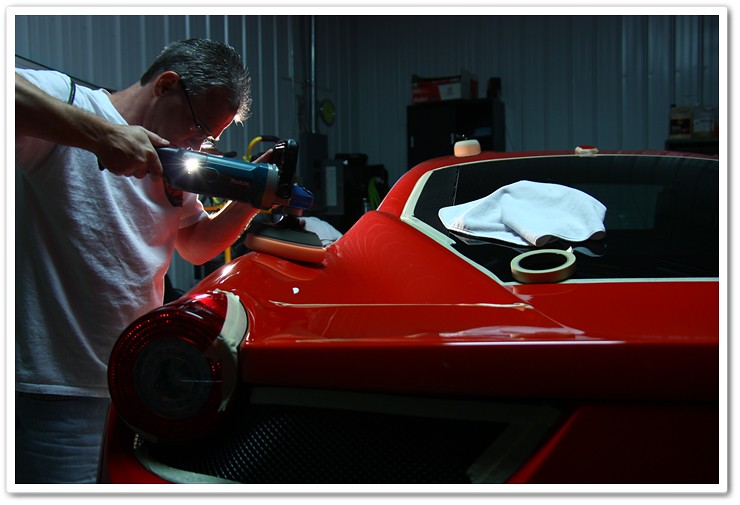
Not only does Meguiar’s make a great product in M105, but the bottles also make great tools to prop up the hood! Here I am “cutting in” the edges around the hood before switching over to the bigger 6.5″ pads. You must be very careful when doing this and weight the top edge of the pad so that you don’t create too much heat at the thin edge of the hood…otherwise you risk burning the edge. I also use slower speeds just to be cautious.

Here’s the condition of the A-pillars! Yes…they even took the aggressive wool pad to them as well!

After using my 4″ orange spot pad (sorry…just a tad out of focus).
Mirror before:
Mirror after:
After many hours of compounding, I finally finished up and proceeded on with finish polishing to remove any haziness leftover from the compounding stage, and to refine the gloss and clarity even more. Now here’s where I noticed the difference in the clear coat in comparison to previous models. Normally at this stage after using Meg’s M105 I could go straight to M205 Ultra Finishing Polish and a Tangerine pad on the Porter Cable and it would easily remove any marring from the compound, and refine the finish even greater. When I tried this combination, I restored a lot of gloss but found that I still had light defects remaining. Hmmm.
When I have come across very hard paints that wouldn’t allow me to jump from M105 to M205, I have used Menzerna PO203S Power Finish on a slightly more aggressive pad to bridge the gap. Power Finish has just a bit more cut than M205, and finishes down very fine as well. Although it takes more time since it is a traditional diminishing abrasive polish that requires proper break-down time (M205 is a non-diminishing abrasive that works very quickly), I no longer had the option of the quick-finish with M205 and simply had to stay working late!
So away I went with Menzerna Power Finish and a Green light cutting pad on my Porter Cable 7424XP on speed 6 with moderate pressure through the breakdown cycle, and then did my last several passes on speed 4.5 ~ 5 with little to no pressure to make sure that I was finishing down as well as I could.
I started working on the Italia on Tuesday afternoon, and it is now Thursday evening! On jobs like these I can usually expect another 5 hours or so of work after I have finished polishing, so I know that I’ve rounded third base and am on my way to home plate. I cleaned up my work space a bit to get ready for the next day, sat back and enjoyed the beauty of the now properly polished 458, and closed up the studio for the night and would start back up the next morning. It’s been a long 2.5 days so far!
The Final Touches of Detailing a Ferrari 458 Italia:
After so many hours of compounding and polishing, you can expect a tremendous amount of polishing dust and residue in all of the cracks, crevices, and around the edges where tape was applied. All of this needs to be fully removed and cleaned prior to applying your sealants and / or wax. It’s time consuming, it’s a bit laborious, but it’s one of the signs of a quality job. Depending on the area or surface composition, I’ll use a combination of Optimum No Rinse, Meguiar’s Ultimate Quik Detailer, or Meguiar’s M34 Final Inspection to clean it all up.
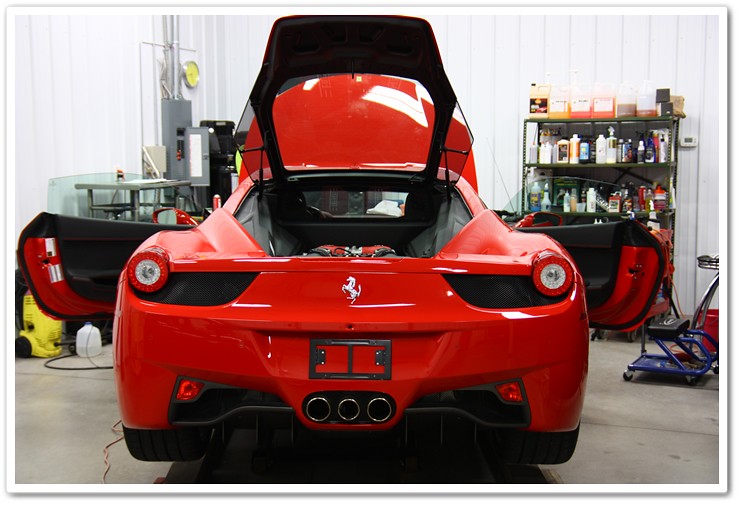
The 458 is all opened up for this process:
With that behind me now, it was time to further clean the paint from any polish residue and prep it for a good bond with my sealant. For this I use Chemical Guys EZ Creme Glaze on the Porter Cable, with a soft Blue pad, at speed 6. It’s a relatively quick process (maybe 20 minutes to go around the entire car), but it makes a big difference both in terms of looks, and for how well the sealant bonds.

After application of the EZ Creme Glaze, I moved on to the application of my sealant of choice…Blackfire Wet Diamond. It looks great on every color of vehicle, and provides durable protection for many months. This too gets applied with the Porter Cable (by hand in the tight areas) on a Blue pad at speed 3.5~4.
Don’t forget to apply your sealant and / or wax to the door jambs!

Blackfire Wet Diamond needs some time to cure, so while that is happening I take the opportunity to work on other areas of the car to keep the workflow moving along. If I would have had another day for the Blackfire to finish curing, I would have applied a coat of Chemical Guys Ezyme Natura wax. I have done this combination on several Ferrari’s in Rosso Corsa, and it looks absolutely beautiful. I’ll be working on this particular car again here in a few weeks just before we show it at the Arthritis Foundation Classic Auto Show, and will apply the Ezyme at that time.
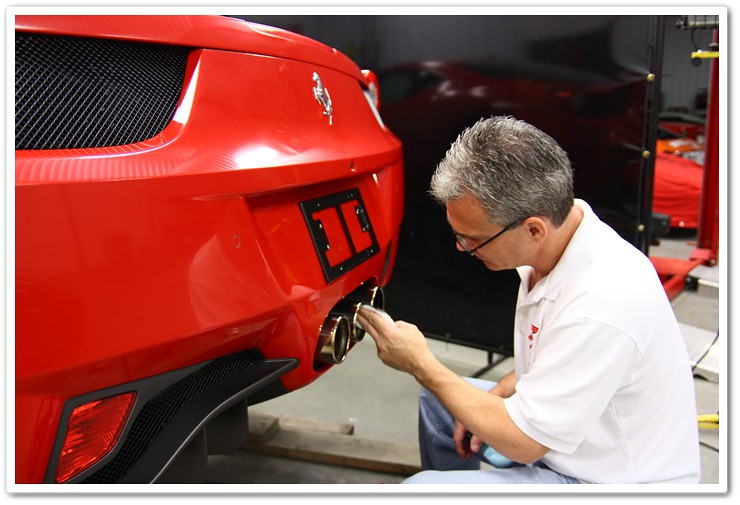
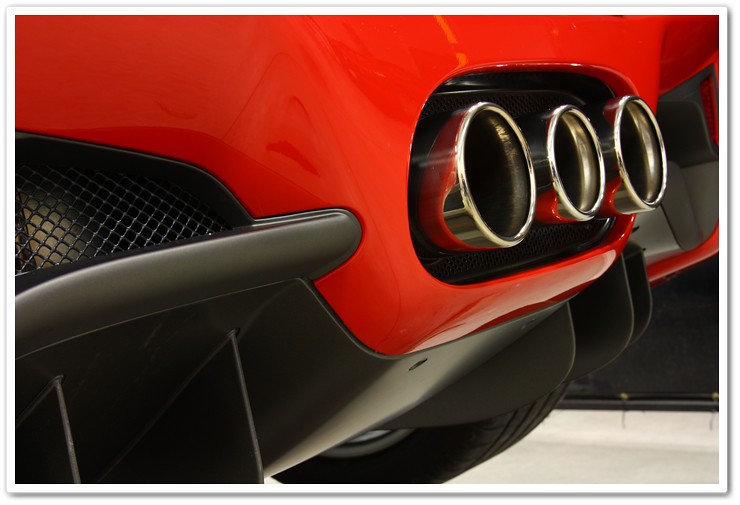
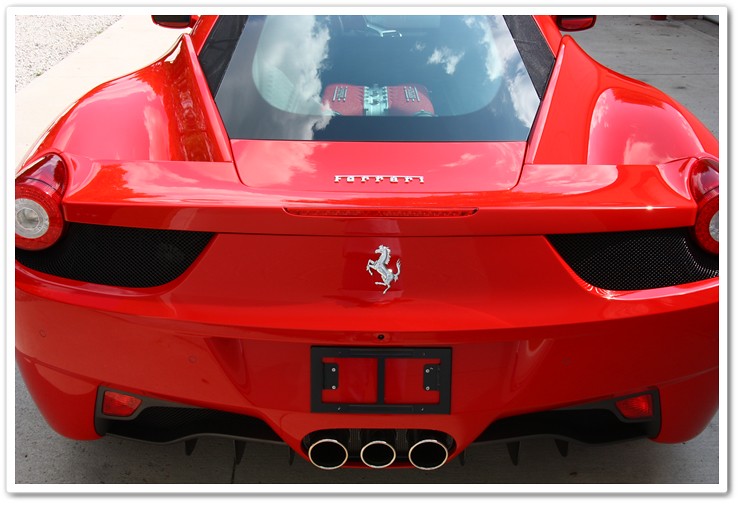
Here I’ve moved on to cleaning and polishing the unique 3-tip exhaust configuration on the 458. First I clean them inside and out with Meguiar’s All Purpose Cleaner Plus, and then polish them inside and out with Optimum Metal Polish.
Moving on to the wheels, I dressed the tires with Chemical Guys Extreme V.R.P. Dressing. It looks pretty glossy when first applied, but after a short period of time it dries and leaves a nice, matte finish. To ensure that I have an even application, I’ll go back over the tires a second time after ten minutes or so with my applicator, but I won’t apply any more product to it.

Then I sealed both the outer surface and inner barrels of the rims using Klasse Sealant Glaze. Sealing them will provide a better gloss to the finish, and it will make them easier to keep clean in the future.
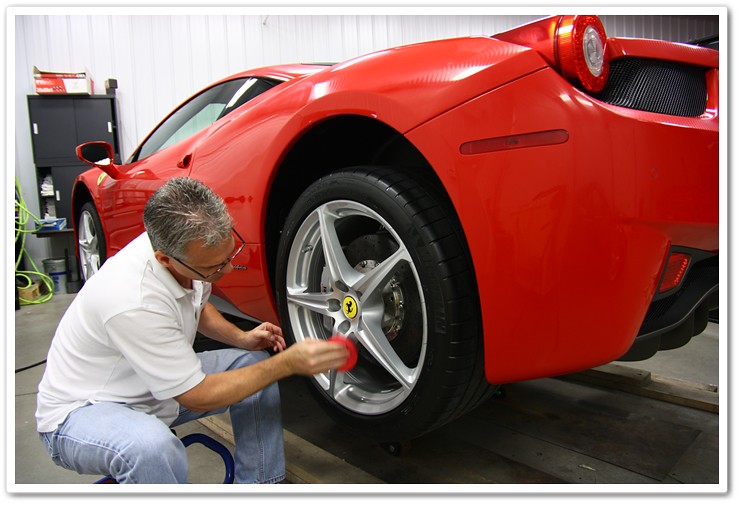
And finally dressed the wheel wells with Chemical Guys Fade 2 Black.

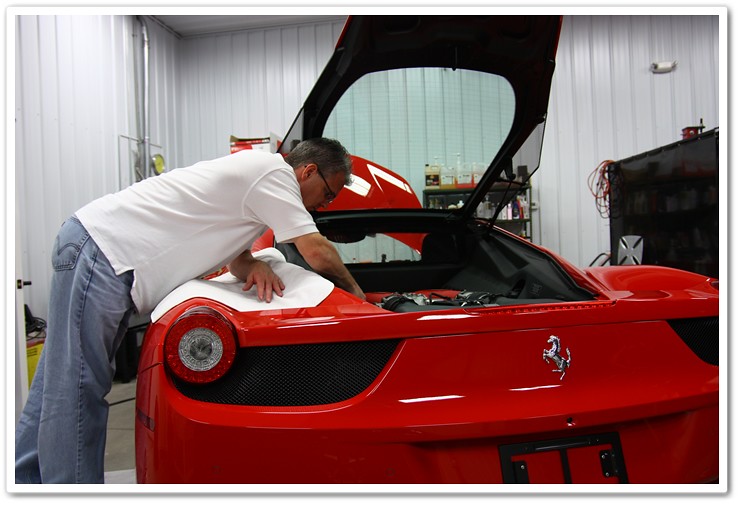
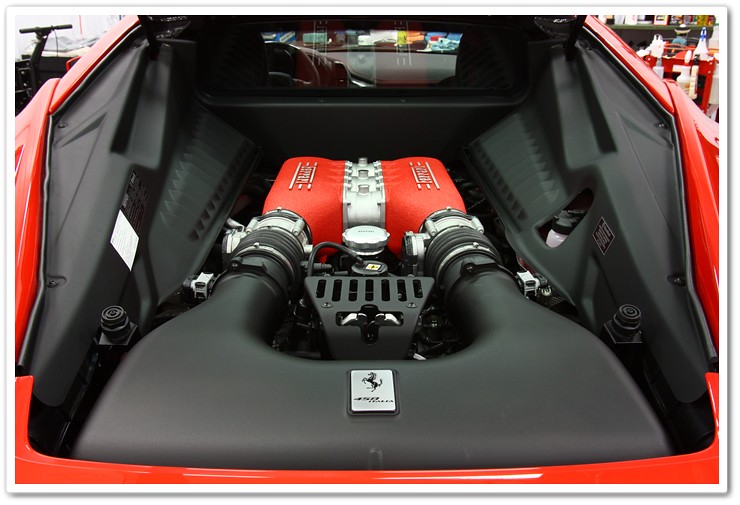
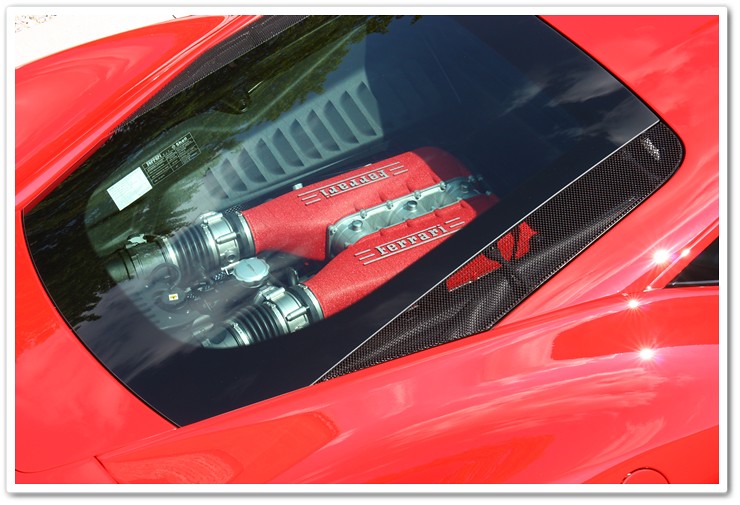
Next up is the engine compartment on the 458. Now you may think that the engine bay wouldn’t be very dirty on a brand new car, but all Ferrari’s go through extensive test driving on road and track after they’re built. There’s also significant ventilation around the rear glass that allows water, dirt and everything else to get in there as well. I cleaned up the engine bay with Optimum No Rinse (dilluted to quick detailer ratio in a spray bottle). As you can see, it’s not real easy gaining access in there to clean the engine and the small back window. I was standing on a platform, and covered the fenders with soft Great White microfiber towels to protect the finish.
After cleaning, I treated any plastic components with 303 Aerospace Protectant.

The trunk area was cleaned and vacuumed, and all hard surfaces treated accordingly. The owner of the vehicle opted to keep the plastic on the cases for now (I had to call that out otherwise somebody would have given me a hard time for not removing it!) 🙂

The exterior is complete, and I needed to take care of a few areas in the interior of the 458. There wasn’t a tremendous amount of work I needed to do in there, and didn’t get many photos of the process. I cleaned up the leather with Leatherique Prestine Clean, cleaned and treated hard surfaces with Meguiar’s Quik Interior Detailer, removed any shipping plastic that remained on various items, and cleaned the glass with Meguiar’s Glass Cleaner.

I think that about wraps it up. Are you ready for some finished after-shots?
Ferrari 458 Italia Detailing Images:
After 25 hours worth of work refining the finish of this beauty, I am proud to present plenty of juicy pictures for your viewing pleasure. The 458 finally looked the way it should have from the factory, and both indoors and outside in the sunshine it looked nothing short of breathtaking. Because the 458 is such a work of art, I took (and posted) a tremendous amount of images…hope you don’t mind!
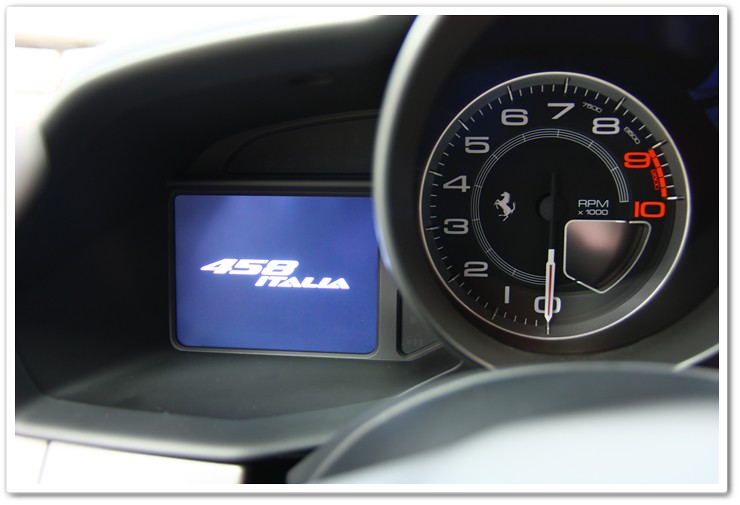
Grabbing onto this steering wheel just may think your name is Fernando Alonso, and you’re sitting behind the wheel of an F1 car!
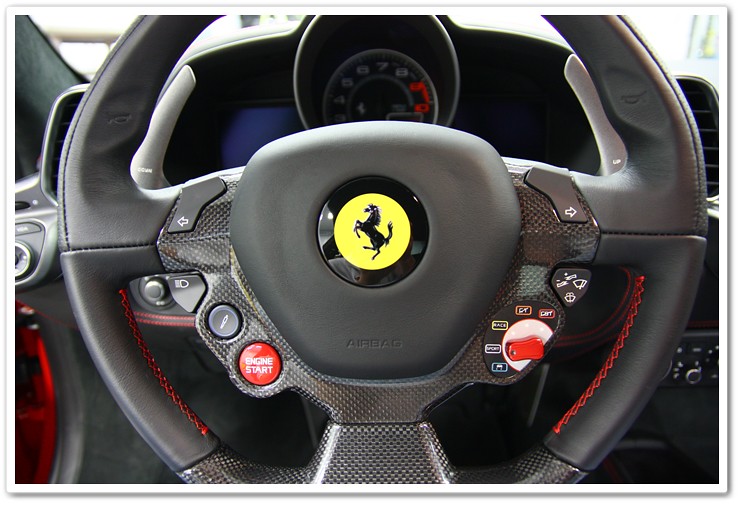

9,000 RPM redline!
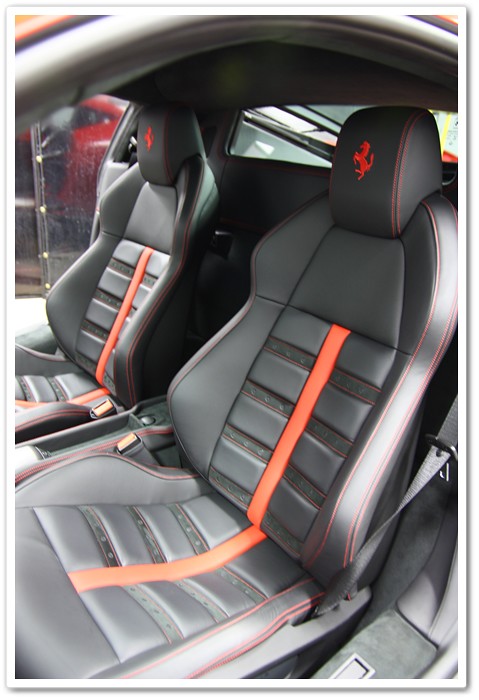
Unfortunately this photo didn’t turn out as I had hoped because the seats are a big source of pride for the owner…he drew up the design and sent them to Ferrari with his order. They obliged!
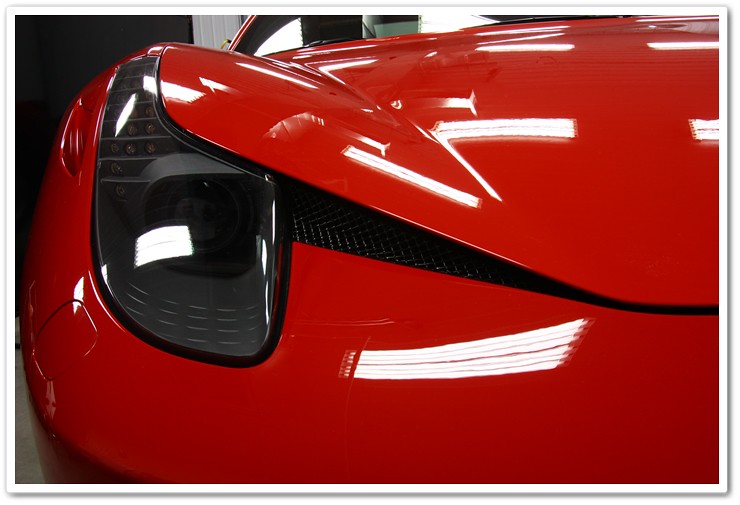
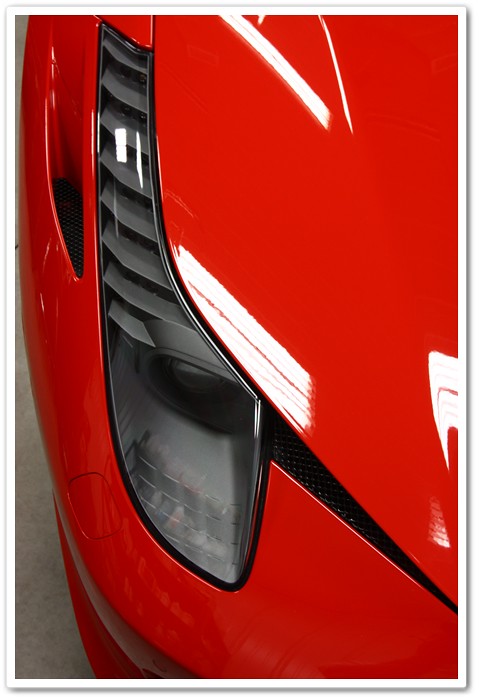
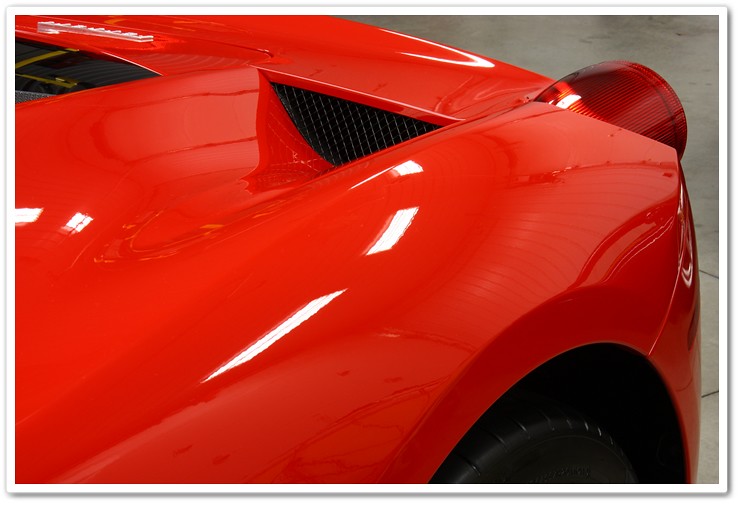
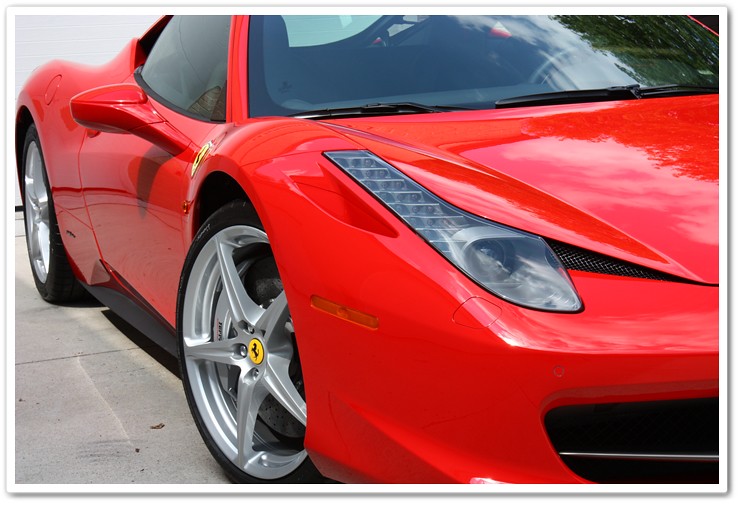
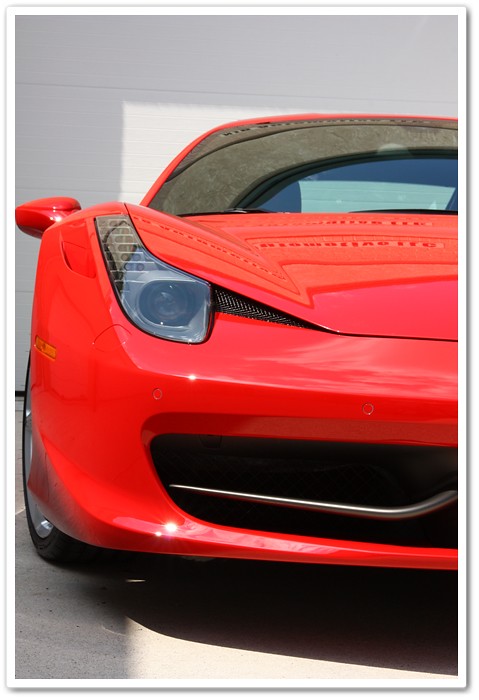
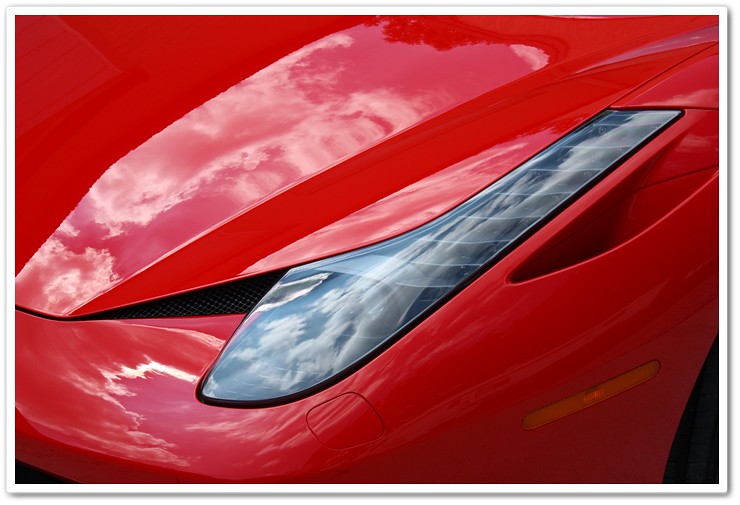
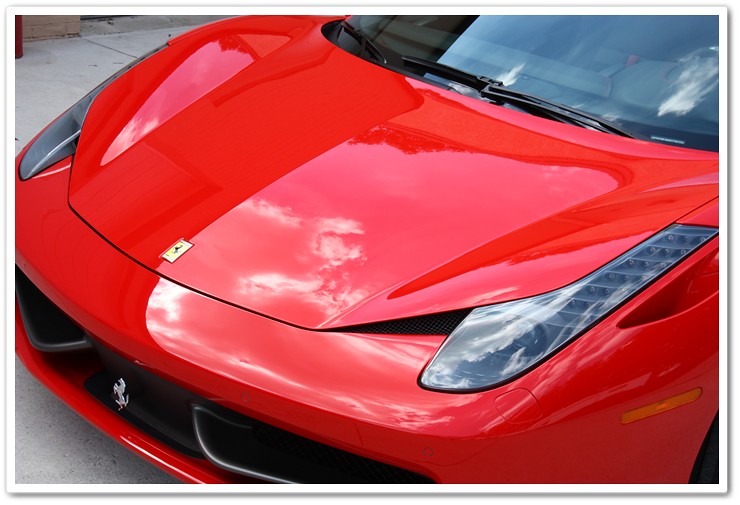
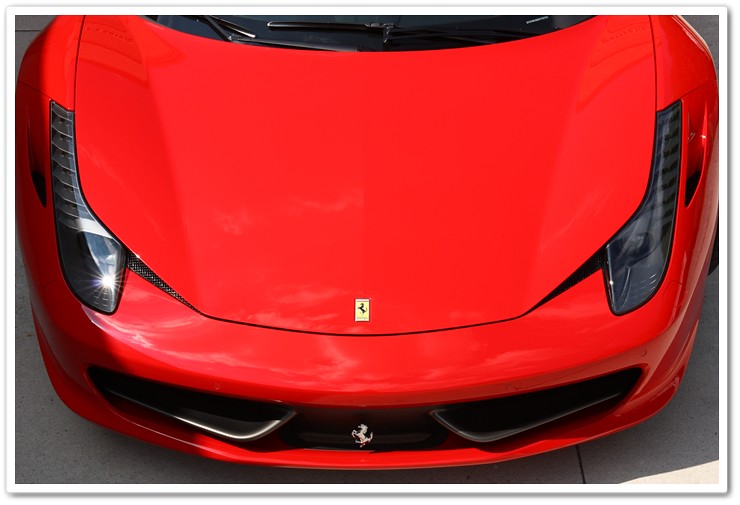
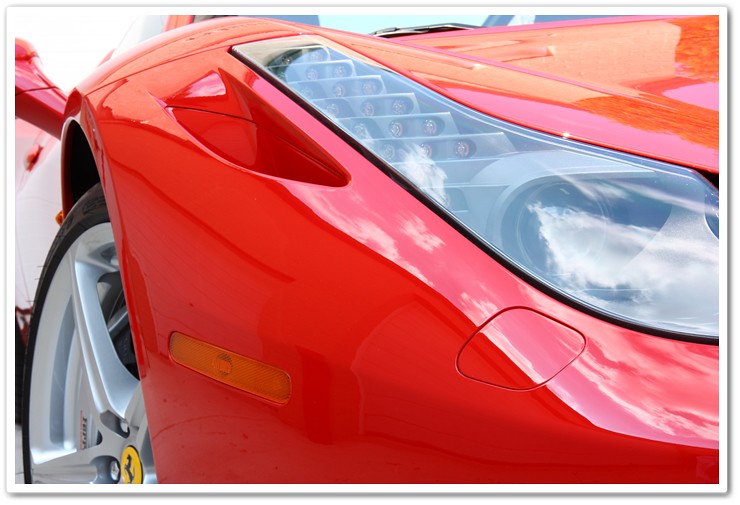
Now for what I feel is the defining design element of the 458 Italia…the front end and headlight area. I have plenty of photos of this area below simply because I wanted to capture as many angles as possible. It looks fantastic in photos, but nothing compared to what it looks like 3-dimensionally in person.
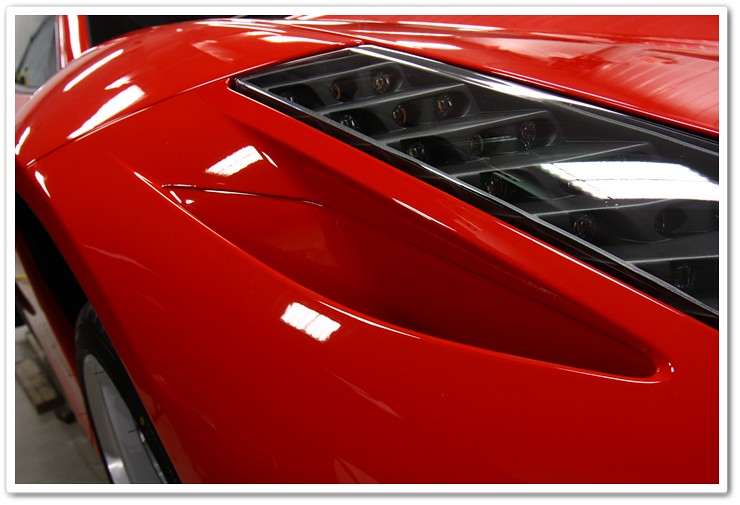
I’ve included 2 different photos here of the same vent next to the headlight just so you could get appreciation for the sculpting that goes on here, but also for what it took to polish these out! For this small area, it required polishing by hand, by Porter Cable, and by Makita rotary polisher. This was quite challenging and time consuming, but the end result was well worth it.

Brembo Carbon Metallic rotors and massive calipers

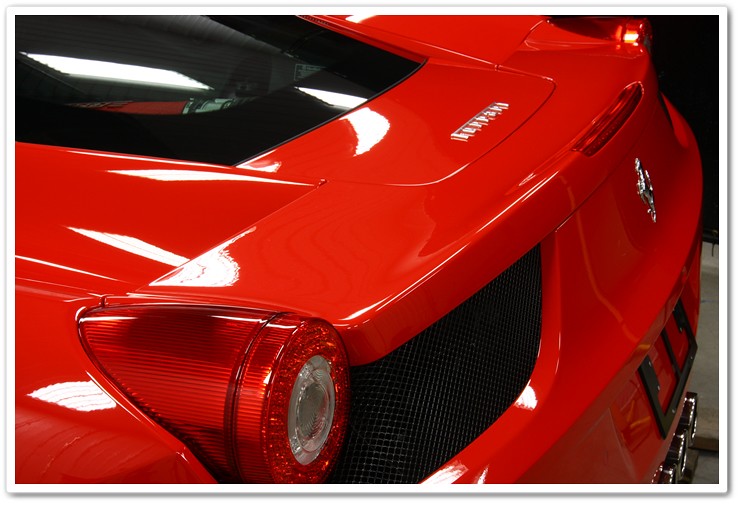
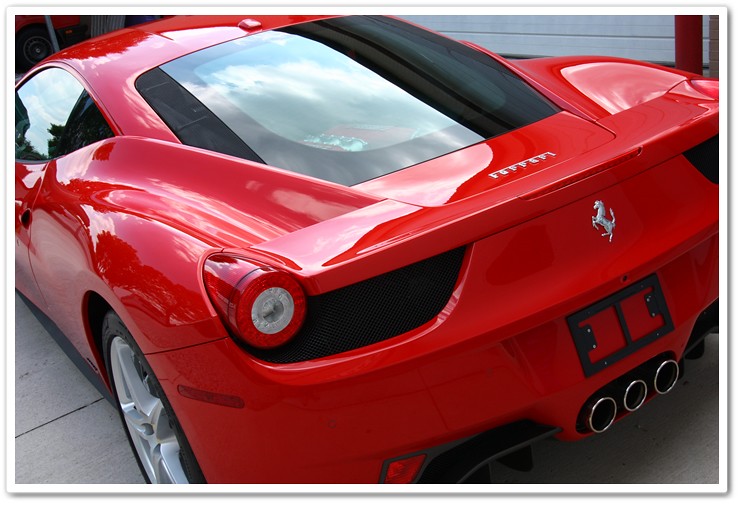
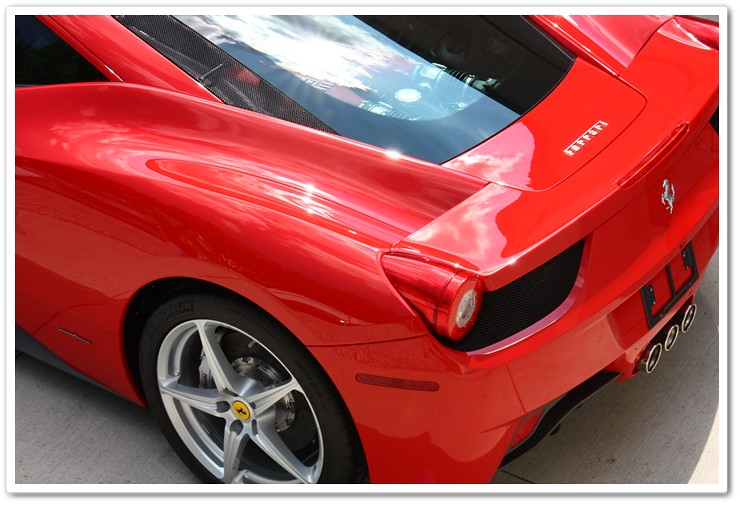
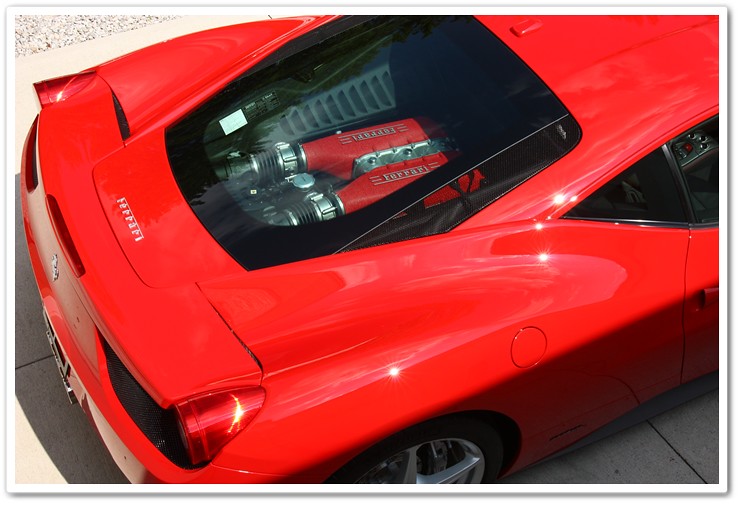
The tail lights were badly swirled as well from the wool buffing process at the factory, but through several polishing steps I was able to restore them to full clarity.
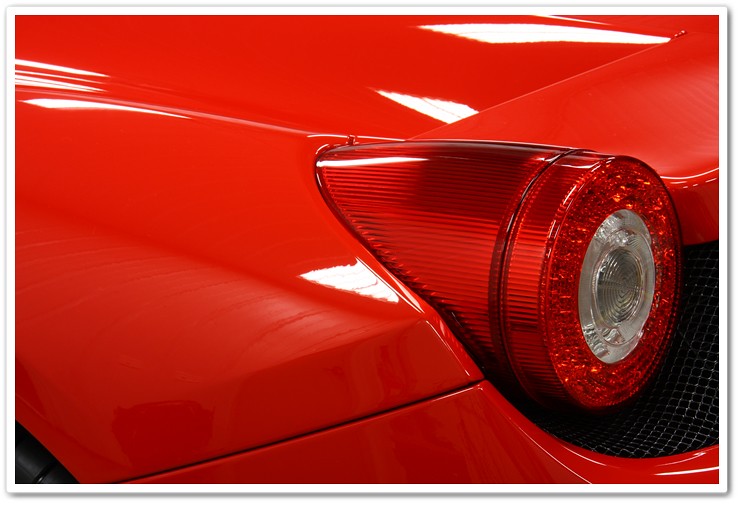
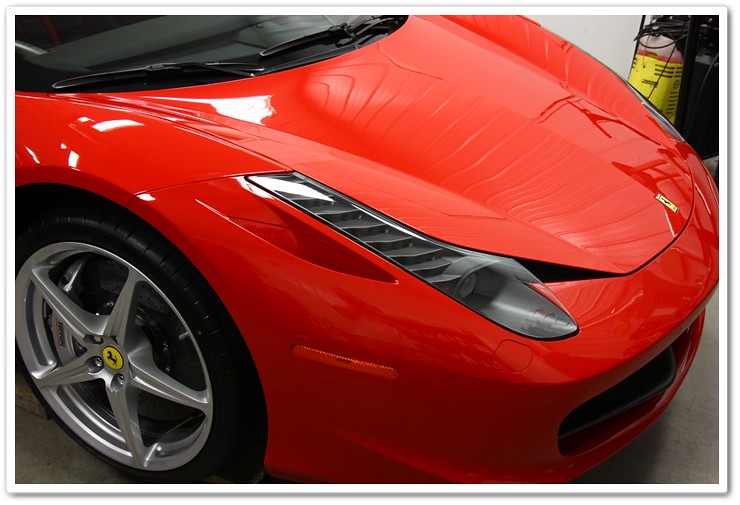
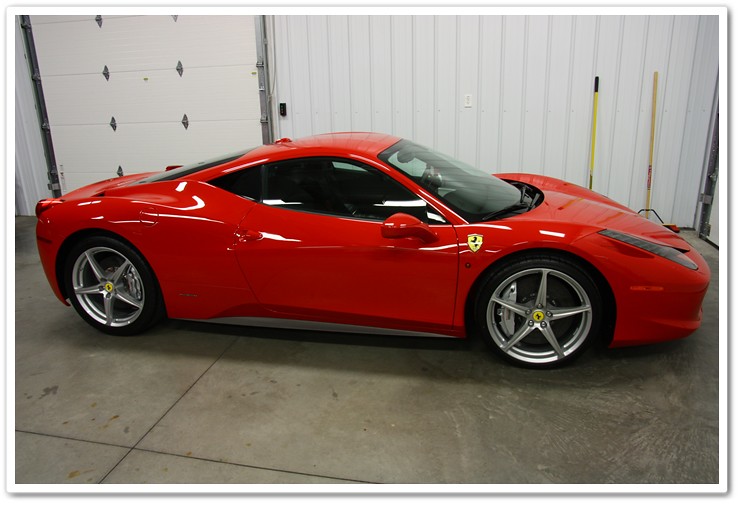
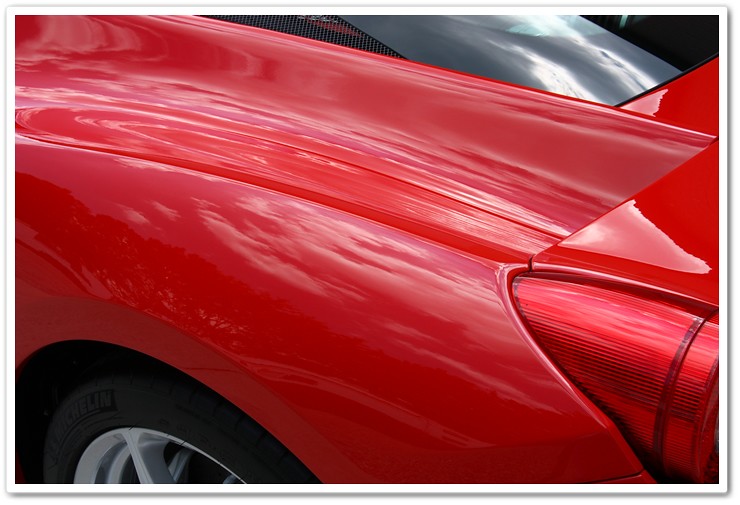
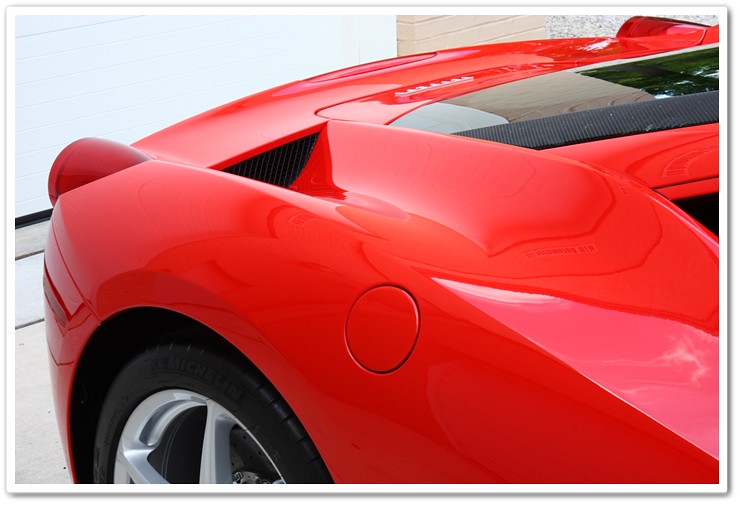
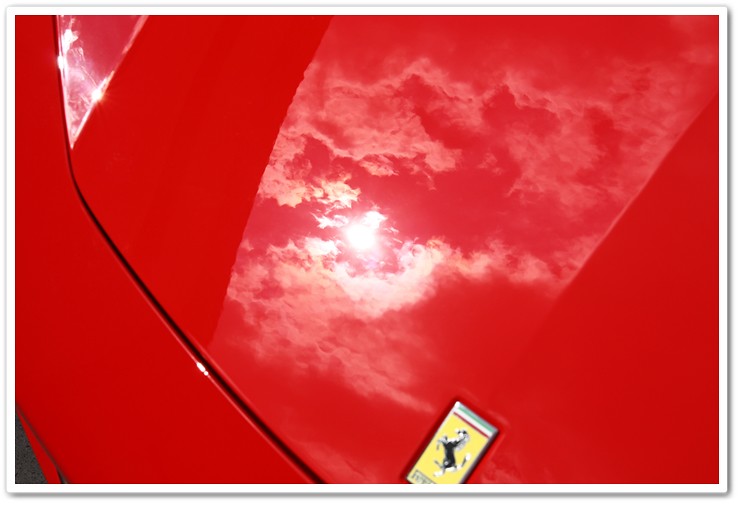
Such beautiful lines on the 458. How about that level of gloss?

Let’s take a quick look back at the original “before” photo of the front bumper with the Brinkmann inspection light:
Now this is what it looked like afterwards (and how it should have looked from the beginning).
Now let’s pull the car outside and see how it looks. As with the rest of the photos, there has been no post-processing other than to re-size and add a border.
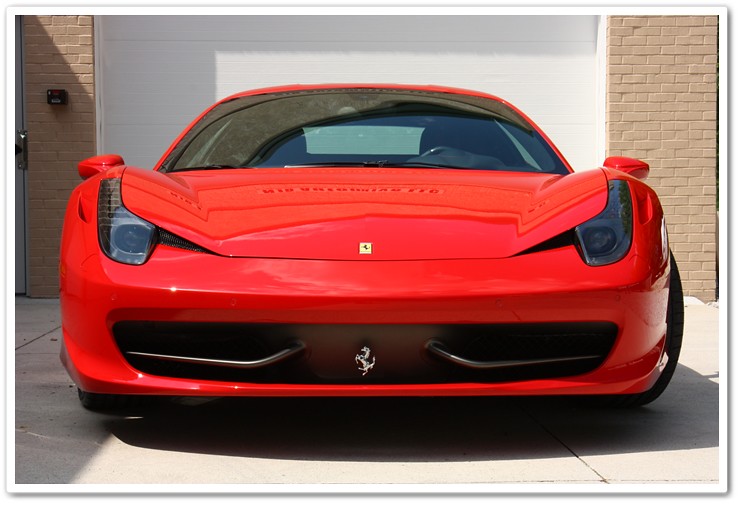
Now that’s a mean looking face!
On this shot I actually focused on the 458 Italia logo on the dash…


I loved this shot…
Now for a series of sun shots, or as we call it in the detailing world: the light of truth! If there are any swirls or defects, you’ll see it in the direct sun.
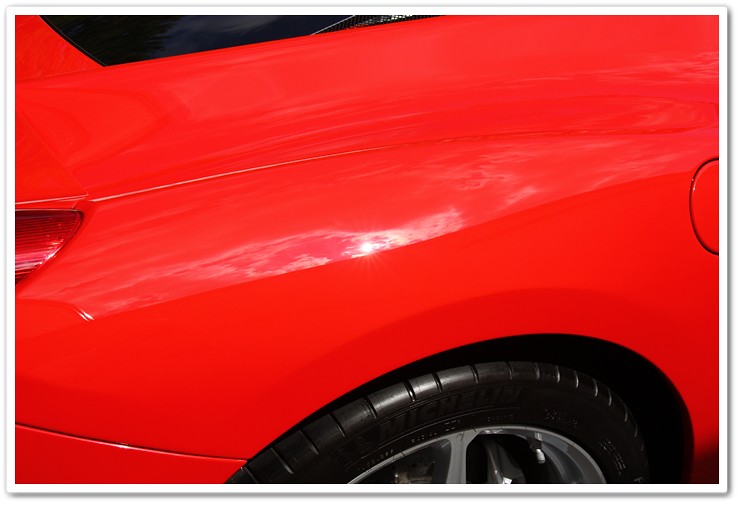


When the car was covered in swirls and wool-induced defects, there was no way that it would be capable of producing this level of reflections.


Another one of my favorite shots:
I certainly appreciate you taking the time to follow me along in the detailing process of this stunning new Ferrari 458 Italia. It was great to have been commissioned to correct one of the first examples to arrive in North America, and equally enjoyable to share it with everybody.
If you’re waiting for the arrival of your 458 (or have just received it), and you’d like for yours to look as fine as this one now does, please get in touch.
Should you have any additional comments or questions about this article, please reply in the comment box below.


Amazing work Todd! It’s been a while since you have done a write up like this. I noticed while polishing you applied polish directly to the vehicle instead of the pad. Why is that?
Thanks Mike. I only do this with Megs 105 and Megs 205 because it is less sensitive to how much polish you’re using. With a diminishing abrasive like Menzerna, you’ll have troubles getting it to properly break down if you use too much polish. With non-diminishing abrasives like 105 and 205, you can just lay it right on the surface and go to work.
Wow, an awesome display of auto detailing!
Thank you Gerald!
Todd,
You always perform such a magnificent job on everything! This Ferrari looks too good to be true. Seriously, you need to send your Before and After pictures to Ferrari/Italy so they will see how badly they are sending these supercars out-from the factory.
Hey Steven, thanks a bunch for the compliments on my work. I have to agree…this 458 looks absolutely insane. If you think the pictures look great, you should see it in person. 🙂
I’m pretty confident that Ferrari knows exactly how these are shipping out. They win in just about every other category though, so I guess they’re willing to accept it. No big deal though…just bring your Ferrari to a qualified professional detailer who can fix it.
Insane, absolutely insane! What I would give to sit along side you for a couple of hours while you are taking on a job like this. If im ever in Ohio, I may look you up and see about being your “helper” for a few hours! Thanks again for the amazing work and writeup!
Thanks Jared. Come on up…I’m always looking for somebody who can work wheels for me! 🙂
Seriously though, I really appreciate the positive feedback.
Amazing work as always Todd, very happy to see you doing well!!!
If you don’t mind I may use the write up as an example of how new high end cars are coming from the factory in not so great condition.
Cheers!
Hi Wes!
Yes things are going quite well and hope they are for you too.
Feel free to pass the link on to others.
Todd
Todd: your knowledge and talent are perfectly showcased with your long hours of work restoring the finish on this 458 Italia. Thanks for all the detailed info that you include in this outstanding write-up! Who shoots all your pictures here? They must put in some long hours to.
Hi Charles,
Thanks for the positive comments. I enjoy putting the cars through this kind of transformation, and I also enjoy sharing the process with others in hopes of educating people on the art of detailing. Oh, and the photographer and detailer are one in the same! 🙂
Hi Todd, I know the owner of this 458 through a friend and recently got to do a mini-shoot/experience the rest of his stable and he mentioned his detailer. He posted this on FChat and I’ve read through several of your other posts. I gotta say I’m absolutely stunned at the work you do. I try to do a bit of detailing in my spare time and pride myself on how clean my car is but after seeing some of your work I feel like I would be embarrassed to show you. Do you do any apprentice/teaching type things for detailing work? I’d love to learn how to do it properly.
-Kevin
Hi Kevin,
Thank you kindly! As you’ve experienced then, the owner of this 458 has quite the collection and I enjoy working on them. Are you attending the Arthritis Foundation show here in Columbus in a few weeks? If so, please stop by our booth and we’ll chat and see what we can do to increase your detailing knowledge.
Thanks,
Todd
I’d love to stop by the show but unfortunately I’ve never heard of it so I have no info on it. Do you know of a website where I can find a date and time?
Also, you’ve detailed his F40 too haven’t you? When I did the photoshoot it I was really impressed by how pristine it was.
-Kevin
Kevin,
Here’s more information on the show: Arthritis Foundation Classic Auto Show. Columbus, Ohio. July 9th and 10th. Actually I’ll be working on the F40 soon…
Oh really? I’m in awe of that car. It’s spectacular.
I may be in Chicago the weekend of the show but I’ll definitely try to be up there if not. Out of curiosity what kind of camera do you use?
I use a Canon Rebel XSi with a Tokina AT-X Pro 16-50 f/2.8 lens.
Todd,
Just amazing work and results!! I’m an old (64) enthusiast detailer and am typically stunned at the hours and attention to “detail” the expert pros put into their work.
I was curious why you did not use BFWD on the wheels vs. Klasse? BFWD and Menzerna PL are my two favorite sealants and find they work well on wheels…the slickness is awesome as you know. I do believe BF has a special wheel sealant but I have not used it. I also usually clean the engine first and then move on to the exterior.
Just fantastic work….25 hours….wow!!
Roger,
Thanks for the compliments and I’m glad you liked the article and results.
I don’t have a specific reason for not using the BFWD on the wheels…I’ve used it many times before for this very application. Sometimes I just like to grab something a bit different, or use a product that I know works well, and that I have plenty of it. I also used KSG on this same client’s 599 HGTE.
If there’s major cleaning required on the engine, I’ll start it at the same time I’m washing the car and then go back for any final wipedowns or removal of polishing dust under the hood when I’m done.
Thanks again,
Todd
Wow Todd! This is the most thorough work and documentation I’ve ever seen. I look forward to meeting you at the Arthritis Foundation show. It is one of my favorite shows by the way. What would be the best day to go? I have at least a million questions for you.
Tim
Thank you Tim!
Stop by the NJB / Esoteric display anytime on Saturday. I look forward to meeting you as well.
Todd
I can’t even put into words how magnificent your work is, Todd. Absolutely stunning — and truly esoteric! I enjoy reading the DI Blog and your writeups very much, and appreciate the abundance of information and eye candy you provide us with.
If I’m ever near Ohio, I hope you don’t mind if I stop in and buy you a beer! 🙂
– Joe
Very nice compliments there Joe (and use of the word esoteric…bonus points for you), and I sincerely appreciate it. And I’d be happy to take you up on the beer offer. 🙂
Todd
Todd,
Great work it is just amazing on how well you take pride in your work. I could only imagine what the owner stated after the 458 was delivered. One question I had for you is. What are the Surbuf pads that you used and what level of correction can one achieve using them compared to the orange or white pads with the PC 7424XP.
Thanks,
Danny
Thanks Danny…the owner was very happy with the results. The Surbuf pads are to the PC what wool pads are to the the rotary…they are aggressive and achieve a higher level of correction than foam pads. Watch the blog because we will be releasing a product review and info on them here shortly.
Todd
Hi Todd,
Your work is amazing. May I ask what kind do you use? Is it electrical or pneumatic? I am thinking about putting on in the garage. It looks much easier to work the wheel wells and underside with it. Thanks so much.
Mark
Thanks Mark. It is an electric lift and is a huge help especially on low sitting exotics.
Sorry, I meant to say: what kind of lift do you use to raise the car? Thanks.
Todd, excellent work! A quality write up like this is very much appreciated!
The 458 is my favorite Prancing Horse since the ’79 308 GTS. I’ve officially run out of ways to describe how incredible this thing looks….and your work really did it justice.
Consider this your second beer offer! 🙂
-Scott
Scott,
Thanks kindly for the compliments on both the work and the writeup. I take the detailing and the writeups very seriously, and always appreciate the feedback. Yes, the 458 is truly a remarkable car in every sense of the word. I’ve had quite a few future 458 owners (people who have them on order) from around the country already contact me about detailing them when they arrive in the states, and I look forward to spending some quality time with such an incredible machine.
And thanks to you as well for the beer offer…looks like a party going on in here! 🙂
Todd
Outstanding work as usual Todd! Still loving your writeups! =D
Thanks Denzil!
Stunning work !
– Jean
Thank you Jean!
Todd
Todd, fantastic work! The 458 is one of the greatest designs in Ferrari’s history I think and you certainly did it justice with your photography and superb detail.
Thank you Justin. While the 458 is great when looking at it in photography, it’s even better when seeing it in person!
All the best,
Todd
Amazing job Todd,
Really incredible! If you don’t mind I have a question for you. I am supposed to receive my California in the next few months and the dealer in London insists that I should have it “treated” with G-3 Glasscoat inside and outside.
He insists that it is incredibly good and will keep the car cleaner in and out for much longer! Unfortunately I can’t find any details anywhere about it and haven’t found any owner how has done it..
Have you heard about it?
Thanks
Thank you!
No, I’ve never heard of that product. Typically speaking, these sealant products offered at the dealer level that are hyped to “last for years” fail to deliver, and you never see or hear of them being used by professional detailers. If you can’t find information on it, then I’d recommend that you proceed with caution.
Enjoy your California…those are absolutely beautiful cars. You can find a photo or two of one that I worked on in my Chemical Guys Ezyme review.
Truly phenomenal work as usual. I always know what to expect when I look at a detailing job you’ve completed.
Thank you Jacob, I appreciate the positive feedback.
Todd
Wow. I just returned from the hospital after receiving five stitches to my chin. I was so in awe while watching this transformation, that my jaw dropped and struck my desk.
David,
Sorry about the trip to the hospital and the stitches…I’ll gladly share one of the beers with you that some of the other readers have offered up. 🙂
Thanks for the compliments on my work.
Todd
Tremendous work Todd. We learned a lot from the article. Thanks for sharing.
Thank you, and thanks for taking the time to read through our blog.
Todd
Amazing work Todd! It must be truly rewarding to take this beauty to the next level. Bravo!
Todd,
INCREDIBLE! I love it! I never thought of “cutting” in with the 4″ pads even on large panels! Learn something new every day!
Again, outstanding work.
Aaron
Thanks Aaron,
If there’s a lip or tight areas at the edges (or other areas) of a larger panel, I’ll still use the 4″ spot pad because I can get in tighter, it’s safer, and I can get better correction than if I tried to work a large pad in a tight area.
Take care,
Todd
Todd
You mentioned in one of your blogs Audi clear coat = granite.
For a Red Audi the last stage to get a nice shine with 85RD you suggested LC Blue, will LC Hydro Tech Tangerine do any better?
Regards.
Art
Art,
I don’t see why a Tangerine (more aggressive) would provide a better shine when combined with PO85RD than would a blue (finessing pad). You would just have to do a test to see if there is a noticeable difference on your particular car.
Nice meeting you today at the Arthritis Foundation show. I was also able to see this car with my own eyes and it did not dissapoint. The finish on the car looked deep and bright. Pictures are one thing but to see it live was amazing. I look forward to meeting some of the other Pro Detailers here in the future. Thanks again for all your advice.
Tim
Tim,
It was a pleasure meeting you at the show as well…thanks for taking the time to introduce yourself. I’m glad you liked the finish on the 458. It was definitely a huge draw on the day.
Todd
Amazing work. It does make me sick to think that Ferrari who pride themselves on their paint work as I have heard them say before in various TV shows, actually allow these cars to ship this way, and let idiots clean the cars and buf them with no training at all. I would be pissed if I was the owner. The dealer he bought it through should of paid for the detail as far as I am concerned. That is just the right thing to do for a customer that pays as much as they do for these cars.
Hi Todd great work I would have guessed a NEW Ferrari would have so many paint blemishes. I do have a question though I have a new salsa red 2010 Wolfsburg Jetta with the 3M hood guard, unfortunately I learned using a microfibre cloth on the tape actually caused fine scratch marks on it. Perhaps its due to the colour below it but its quite noticable, have you seen this before and any suggestions on fixing it?? Thanks and keep up the good work!!
Francois
Thanks Francois,
Are you referring to a 3M Clear Bra? If so, these will scratch and get swirls just like paint, so you need to be cautious with the care of them. You might want to read through this article on Clear Bra Maintenance to help you along. And not all microfiber cloths are created equal…I’ve seen many of the cheaper ones that will mar up a finish similar to what a kitchen towel would!
Love it! Awesome work.
Thank you Matt!
nice work would love to be your helper for a day
I can make out from your posts & descriptions that you take a whole lot of PRIDE in the things you do, and it shows in the end results. That’s PASSION!!
I am from India & the climatic conditions have a disastrous effect on the vehicles we own. I was inspired by your blogs & tried applying the same methods while cleaning my cars. The products that you use are very hard to come by in India, & expensive too. But I am glad your posts have educated me enough to take care of my cars with whatever limited resources we have.
The Indian market (in the detailing business) is still in the infant stages, & there is only 1 company (3M) that follows the detailing procedures you list out, again very expensive services.
Your work, someday will definitely be a benchmark when the detailing business in India reaches mature levels.
Wishing you nothing but the best. Keep the articles coming :o)
Thank you kindly for the compliments Joseph, and yes…I do take a lot of pride in what I do (both the work and the articles). Without pride and passion, it’s simply car cleaning.
I have had a lot of correspondence with people from India, and they have said the same thing about the conditions being harsh, and availability to quality products being difficult to come by. Hopefully in the near future the detailing business in India will mature and prosper.
great detailing … best article on planet 🙂
how to maintain Ferrari F458 CPU especially engine and brake?
I’m not sure that I’m following your question…
HI Todd, my name is Levi. I’m trying to start up my own super car detailing side business. I don’t have a shop or a lift. Do you think a good job can be done without those tools? I’m confident in my polishing ability, just don’t know if it’s too big a risk.
Yes, you can do a good job without…the permanent setup of a shop and having a lift just makes things easier and more efficient.
Hello Todd
Love reading your write up’s, never ending knowledge.
kind regards
zahir
Great job on the F458!!
I have a question on the polishes you used in this article. I see that you used the Menzerna (PO203) as your final step. In what situations would you need to use Menzerna PO85RD or PO106FA?
Tony,
Thanks.
The finishing polish / process many times is dictated by the compounding process. With current products and technologies, I would be using a Meg’s MF Cutting Disc on the DA for the compounding stage which would have left a better finish (in comparison to the rotary compound used in this article several years ago). And after that, you could go to something like Menzerna 106FA for the finishing process most likely using a black pad.
I hope this helps.
Ha!
I didn’t notice how old this article was until you mentioned it…I thought it was recent since it just popped up on my facebook news feed from DetailedImage. 🙂
Hi Todd
Have to say that is nice work on the Ferrari. I like a man who takes pride in his work and knows his stuff
As one guy stated about being shocked that Ferrari can ship their cars with swirl marks and using
cheap detailers I have to say is also true. It was requested of me to view and old collectable Testarosa
some time ago and while I was waiting I was viewing some new Ferrari’s in the show room. I was absolutely shocked beyond belief that I could actually see swirl marks in brand new Ferrari’s sitting on the showroom floor but never the less the work you carry out is outstanding and clearly shows that you are truly another Pro within our field of expertise.
Good work
Peter
Dr Buff
Hi Todd
Your passion is truly amazing. I have started this in my country and truly hats off to you. Please can you e mail me the products you use as I am looking at nothing but the best products. I am prepared to have it shipped to my country to enhance my business passion.
Thanks for your time
Dia
Savage job, never saw a fiat shine like that before.
Outstanding job and write up my friend!!. Mr Miyagi of the detailing world!.Very detailed and informative!. Keep on keepin on brother!
Great information Todd it’s always good to share information keep up the great work
6/13/2019 detailedimage.com does it yet again! Very interesting site and a thought-provoking post. Keep up the good work!
Red nail polish! Looks great.
Any supercars you have run across that dont need this kind of lovin?
Todd, you are always speaking so highly about Sonax Perfect Finish. Why didn’t you use it here?
William – This article was written in 2010 and the Sonax Perfect Finish reached the US market in late 2012.
Would you have used perfect finish if it was available when you did the Ferrari?
William – Since hitting the US market Perfect Finish has been one of our favorite polishing options. If that is a polish you find yourself enjoying, it is a great option for you and I am sure it would have performed a great as the light correction step during the Ferrari detail as well.