Pad Cleaning During and After Polishing
by Ivan RajicIn this article, I’ll discuss simple, yet important ways of cleaning your polishing pads both during and after performing polishing work.
After purchasing a brand new polishing pad, we throw it on the polisher, get some polish on it, and have our way with the swirls on the vehicle’s paint. Once done with the section, we wipe off the polish residue and below we find a greatly improved finish that is simply glowing. Fast forward 1 hour, we’re using the same pad, polish and machine on a section of unpolished paint, but after wiping off the residue we realize the results are simply not the same as the first few sections.
Why?
Due to their nature, polishing pads will absorb oils and abrasives from the polishes used with those pads. Over a certain period of time and after a certain number of polished panels on the vehicle, the pads will get saturated with both the contents of the polish as well as paint removed from the vehicle during polishing. Due to this saturation, the pads will not only lose their corrective ability, but we’ll also see splatter coming out of pads due to all the polish and paint residue sitting within the pads’ pores. Dusting at this point is almost a sure thing with most machines.
Here you can see the difference between a fresh pad that has been used on only two sections, roughly the size of a trunk lid, and one that’s been used for a lot longer during the same polishing session.
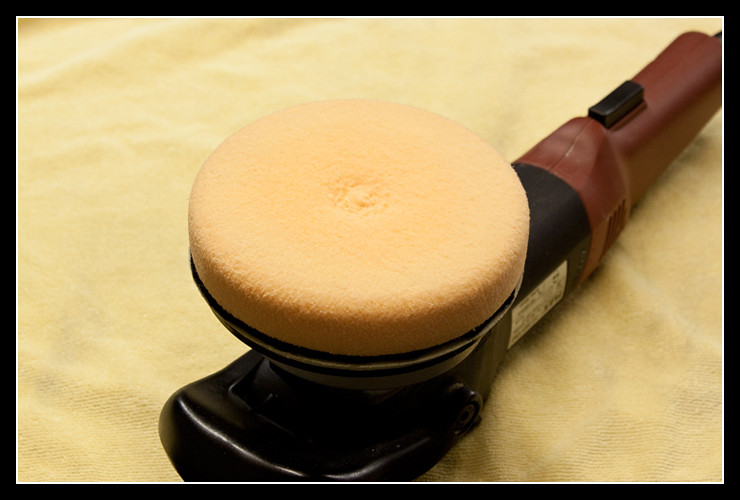
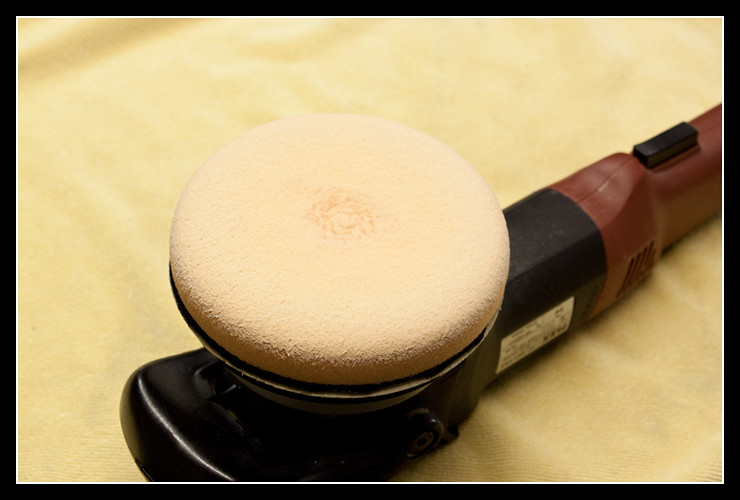
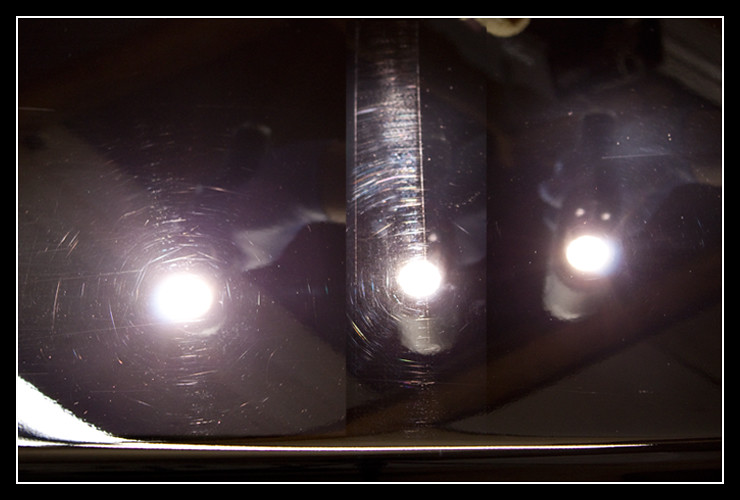
As you can see, the pad in the second photo is completely saturated with polish and needs to be cleaned. Below is a side by side comparison of two sections polished with the same machine, same speed, same pad and same polish showing different results due to one pad being over saturated and over used. This is composed of three different photos so please excuse any noticeable splices. I did it for the purpose of showing the three different sections well and how they compare, rather than trying to show off my skills of photo stitching :). While both the left and right sections show noticeable improvement compared to the original paint in the middle, you can easily see how the section on the right, which was polished with a clean pad, came out much better than the section on the left, which was polished with a used, saturated pad.
How to avoid this?
There are two ways to avoid this during a polishing job. Best way is to have spare pads of the same size and cutting ability. This way, once the original pad starts to become ineffective, you simply replace it with a fresh pad and keep polishing. This ensures that you’re getting the most out of all your pads and the best results possible out of the paint. Even with the spare pads however, you should be cleaning the pad after each section or two in order to remove all the residue and dust that has formed on the pad surface. Here are two methods to do just that:
Cleaning pads during polishing using a plastic bristle brush
As mentioned above, cleaning pads during polishing is important in order to keep up the pad’s cutting ability and keep getting good results while correcting the paint. To do this, you’ll simply need to purchase a small plastic brush with fairly stiff bristles. You can usually find such brushes at any local auto parts store and even some grocery stores. Here’s what the couple brushes I use look like:
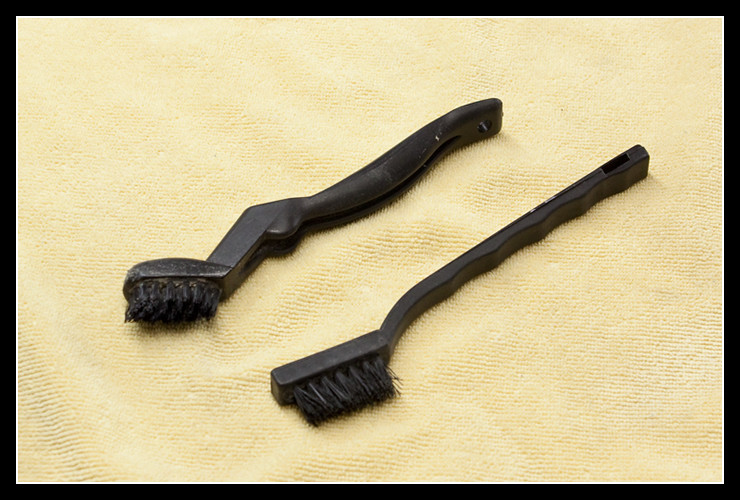
Now that you have your brush, let’s put it to good use. Once you’re done polishing a section on the vehicle and are getting ready to move to the next, simply grab the polisher, flip it over, and turn it on while pressing the brush lightly against the pad surface.
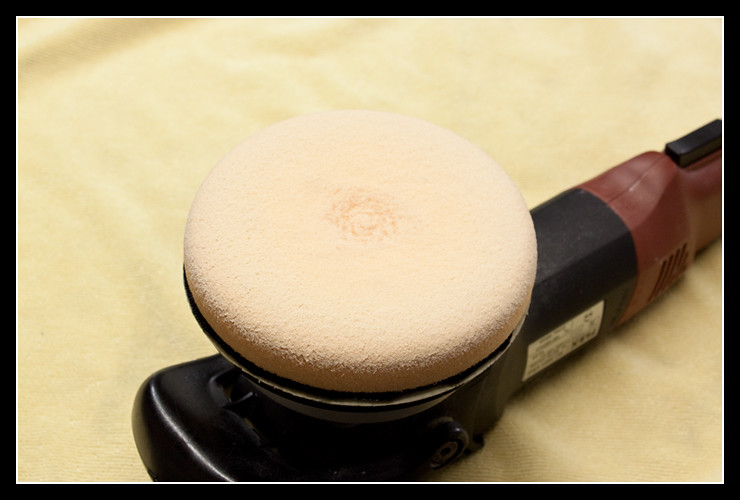
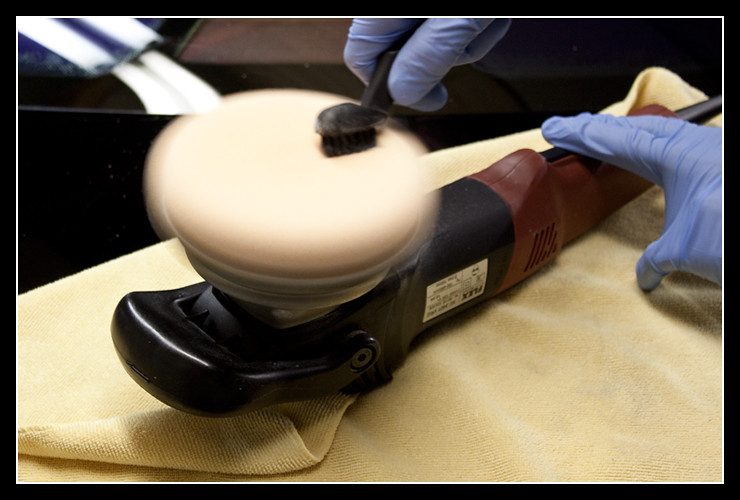

Yes, it’s that simple! The pad will be much cleaner for the next section and will still provide great results until it gets too saturated and needs replacing with a fresh, clean pad. Now you’re ready to apply some more polish and keep working.
The machine you’re using determines the method of cleaning the pad during a detail job. As you can probably tell, I am using a Flex XC3401 VRG polisher here, allowing me to utilize the rotating force to clean the pad. With such tools as the Porter Cable 7424XP, you’re unable to do exactly what I have described above since the pad will all but stop moving once you apply some pressure to it. With the PC 7424XP you can simply hold the pad so it doesn’t move and brush away the residue from the surface. As you may have imagined, a rotary is completely opposite and has even more rotational force than the Flex 3401XC, so it’s even easier to clean the pad.
Few notes and advice:
- You want to do this away from the vehicle so the dust doesn’t get onto the paint.
- Do not use high pressure with the brush as you might damage the foam on the pad. Simply press it lightly against the surface and let the brush and polisher do the work for you.
Cleaning pads during polishing using a towel
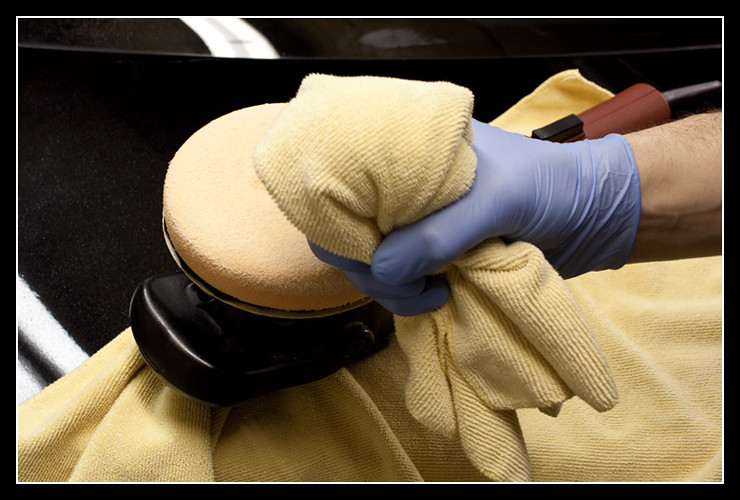
The second method of cleaning your polishing pad during a detail job can be used in place or after the above brushing method. For this method, you’ll be using a clean general purpose microfiber towel and some ONR in a quick detailer ratio. After finishing a section during polishing and/or after performing the cleaning method mentioned above, you will lightly spray the pad once or twice with the ONR QD and let it sit for a few seconds. Then press the microfiber towel with moderate pressure against the pad as you turn on the polisher. The microfiber towel will absorb a lot of the residue within the pad and the ONR QD will help to soften it up and clean it off the pad’s surface.
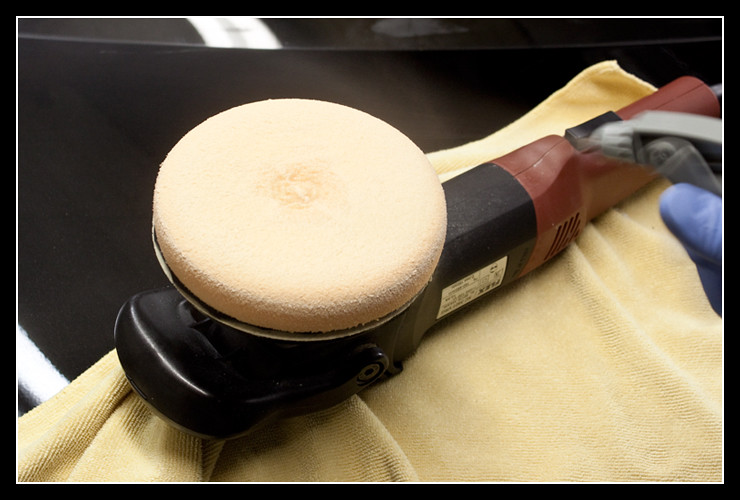
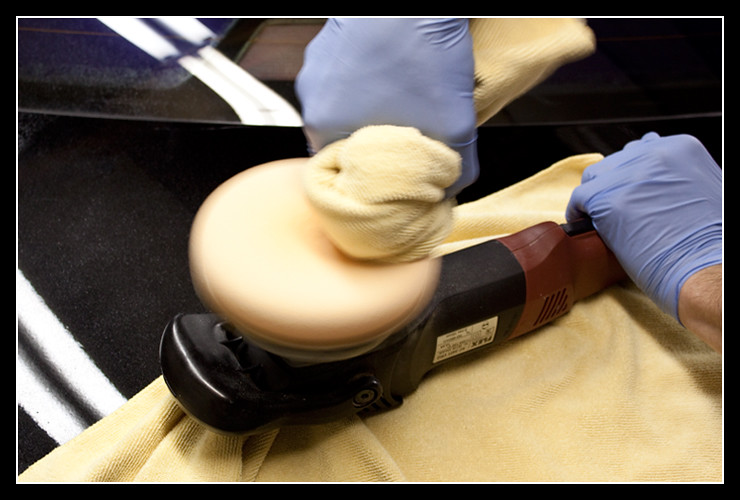
Few notes and advice:
- As with the brush method, you’ll more than likely need to do some work yourself on a PC 7424XP or similar machines due to the lack of rotational force.
- Practice EXTREME caution, especially if doing this on a rotary polisher. If the towel is held too loosely and if it’s not bunched up it can get folded over the pad and caught in the spinning head, resulting in anything from the towel flying onto the floor to a broken wrist. So again, be warned and be extremely careful when doing this on the rotary polisher.
- As with the other method, do this away from the vehicle so the dust doesn’t get onto the paint.
Cleaning pads after work is complete
Finally, the last method of cleaning the pads is done after you’re done working on the vehicle for the day. The pads have done their job and due to the cleaning methods above they’ve done it very well! Now it’s time to clean them up so they’re ready for next time.
It’s extremely important to clean the pads out immediately after use because you don’t want that residue to settle in the pad and get hard. It’ll just be a huge pain to remove later on, don’t ask how I know! Make sure to do both methods above once you’re done working with the pads before moving onto the following process. Now grab all the pads and move them to the nearest sink. Make sure you use a sink where your wife, fiancee, girlfriend or mother doesn’t wash clothes, dishes, etc., because you won’t hear the end of it for a while. Again, don’t ask how I know.
For this, you’ll only need Meguiar’s All Purpose Cleaner Plus (APC+) in a spray bottle, diluted 10-15:1 with water. So it’ll be 10 to 15 parts water to 1 part APC+. Simply spray all the pads with the APC+ “pad cleaning” spray and let them sit, polishing surface facing up, for a good 3-5 minutes. Spray each pad generously but don’t leave them dripping. Also make sure to do this in a ventilated area because the smell of APC+ is very strong.
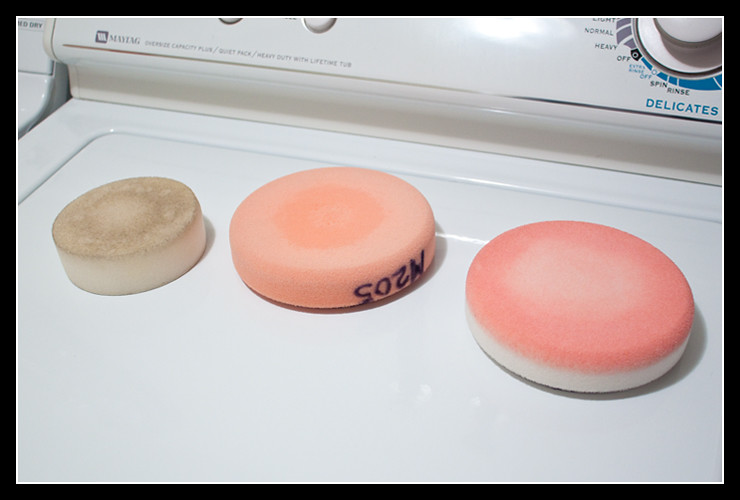
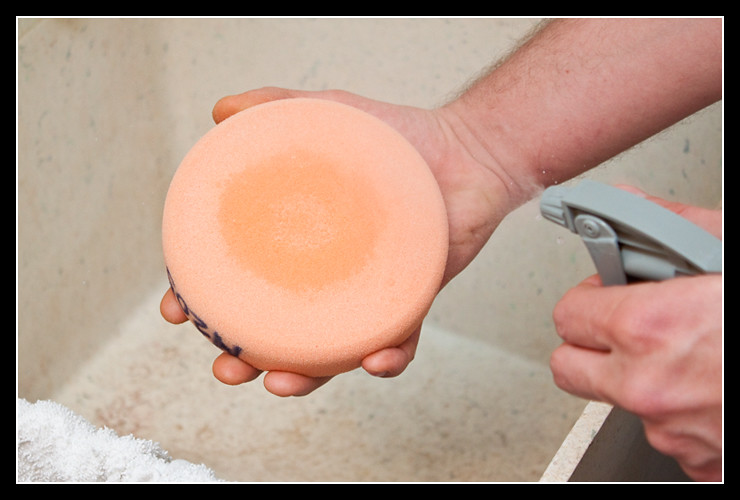
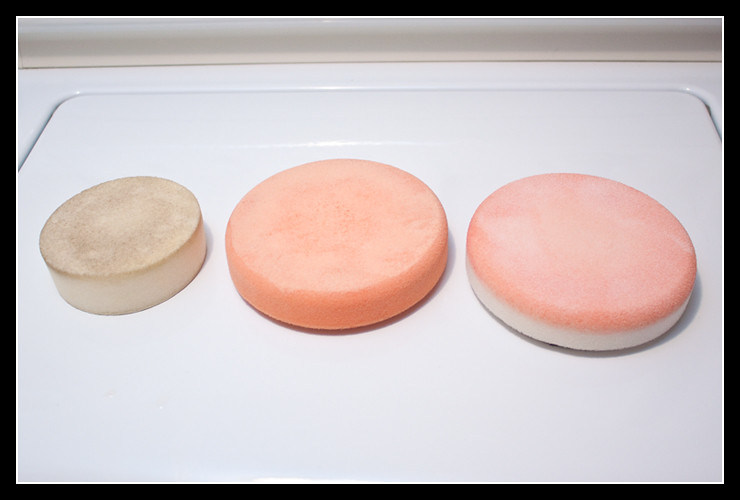
After the 3-5 minutes has passed, turn on the faucet and grab one of the pads, preferably one you sprayed with APC+ first. Hold the pad with both hands and, while supporting it from the bottom, massage the entire pad surface using your thumbs. This should take 10-15 seconds. Once done, keep doing the same massaging on the pad surface, but place the pad under the faucet so the water starts to rinse off the residue coming out of the pad.
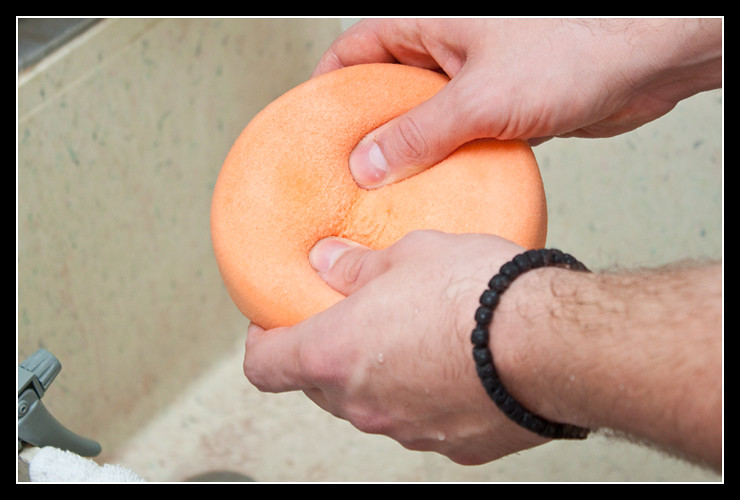
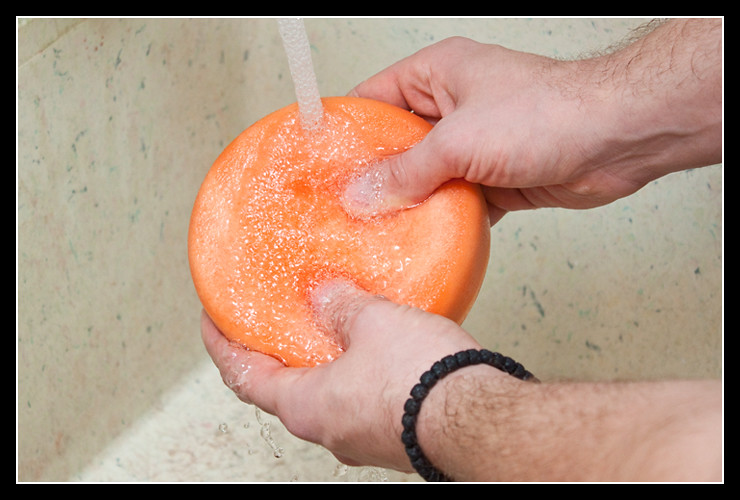
After a minute or so, you should see most of the residue come out of the pad and get rinsed off. Now you’ll want to hold the pad so the water runs over the entire pad surface, then squeeze out as much as you can. Follow that by a little more massaging of the pad surface if any residue remains, then do a final rinse and squeeze to get as much water out as possible.
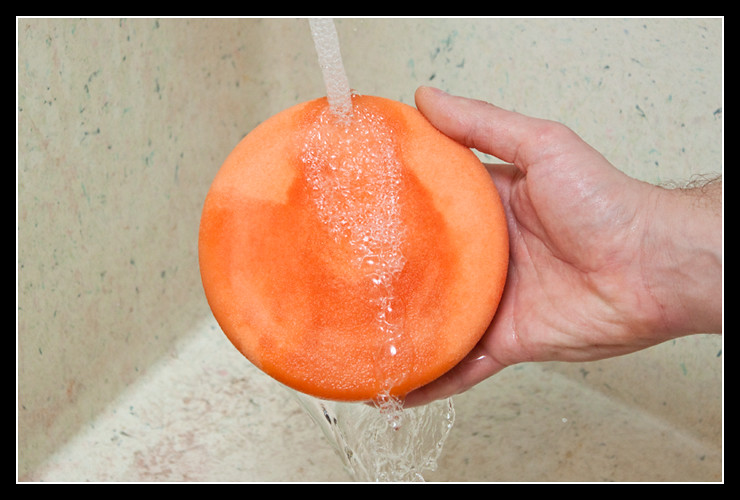
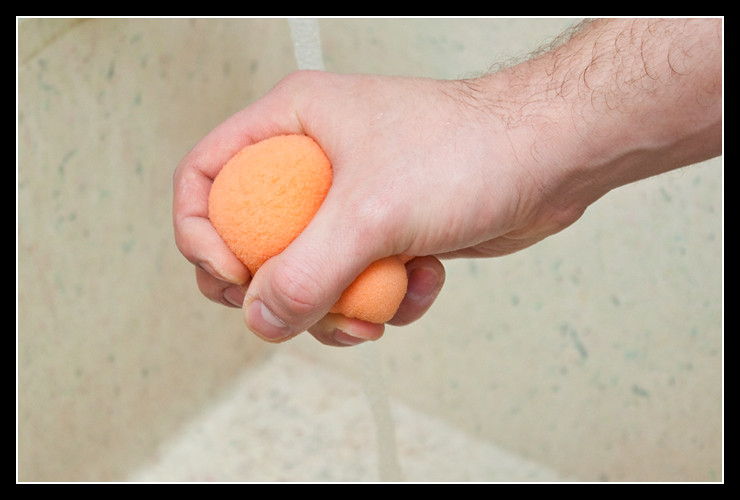
The pad is now clean and ready for drying.
Drying the pads
You have two options, air dry or machine dry. I like to dry my pads in the machine as it tends to be quicker, but I always set the machine to very low or no heat at all so as not to damage the pads. If you decide to air dry, make sure to place the pads with the backing facing up. This will ensure the water doesn’t settle by the backing and disturb the glue holding the backing and the foam together. To help dry the pads, always hold the pad and swing it in the air a few times fairly hard to get rid of some standing water. Another option is to use a rotary polisher to sling water out of the pad. Simply place the machine head inside the sink, or outside where you won’t sling water over anything important, then attach the pad and let it run for 20-30 seconds at a pretty fast speed. In the photo below, I’m using a backing plate that’s actually larger than the pad, whereas it’s probably a better idea to use one that’s a bit smaller than the pad, but it gets the point across. Lastly, once done with the rotary, you can grab a microfiber towel and wrap it around the pad, then wring out the pad so the water is absorbed by the towel.

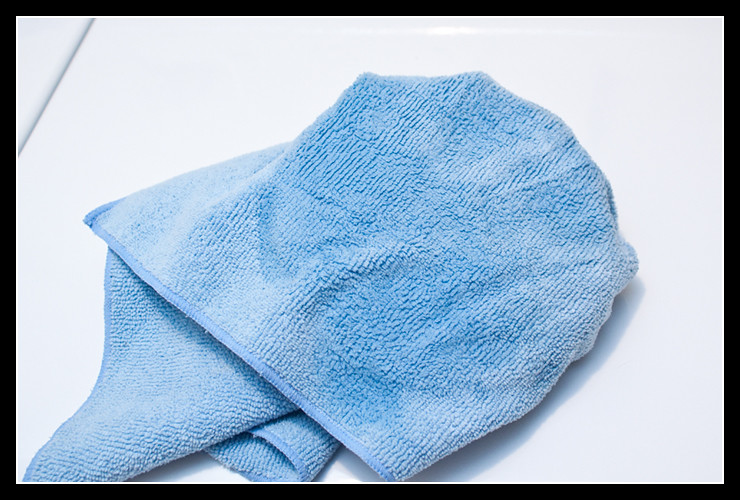
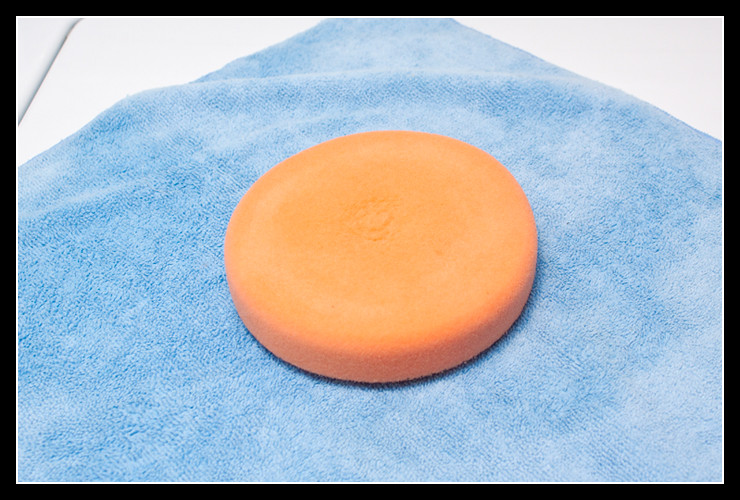
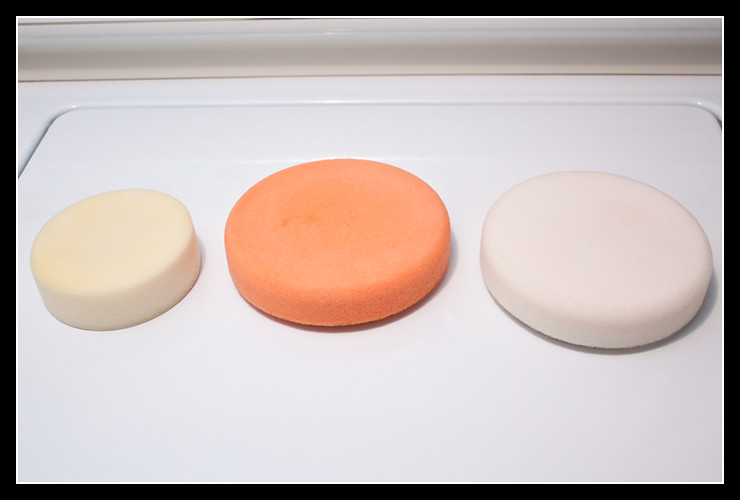
There you have it. The pads will soon be dry and perfectly clean, ready for the next polishing job.
As always, thanks for reading and be sure to leave any questions or comments in the section below.


Good info! What about the snappy pad cleaner? I just fill a bucket and dissolve the snappy pad cleaner in it once finished with a pad I set it in there and let it float with the backing side up, trying to prevent water from getting on the backing side as much as possible. Once it has sat in there for awhile, I take them out and do like you said massage it under the faucet, and wring it out as much as possible, I haven’t attached them to the polisher and tried to spin it dry because I’m afraid once the backing side gets wet the glue will become weak and naturally get ripped off the foam part, so I just use a fan and let it air dry for several hours.
I accidently dropped a few pads in the washing machine with my micro fiber towels. I had so many micro fiber towels that I didn’t see the pads fall in the washing machine with them. I set the washer on warm water, added the detergent and the pads come out looking brand new. I mean brand new! The spin cycle got most of the water out of the pads and then they were dry in a fraction of the time than when I used to do them by hand with Snappy.
Just wash them in warm water with your micro fiber towels and the detergent you use and they’ll come out looking brand new in a fraction of the time. Again I discovered this by accident but it works perfectly. Do not use hot water or the dryer afterwards.
That seems much easier, I use the microfiber detergent by chemical guys, will that work or be too rough on the foam?
STOP! Do NOT wash microfiber towels in anything other than COLD or COOL water. Washing microfiber in warm/hot water will damage the fibers.
Ivan,
I have become very good at cleaning the pads during the detailing and not letting them get to saturated with product. I will usually use 3 to 4 pads on a car depending on the size. As for cleaning I have been letting them soak for about 5 minutes in hot water with Dawn dish soap. The Dawn dish soap seems to do a good job at breaking down polishes and product. I then massage the pads trying to remove as much product as I can, then give a thorough rinse, and set on a wire rack to dry. Seems to work for me, Any thoughts?
Thanks,
Joel.
I’ve used the Snappy pad cleaner and found it to be unnecessarily hash on my hands and not particularly effective. It’s almost like a strong lye. I use the Dawn method myself with very good results. I just pump 4 or 5 blobs of Dawn on each pad, massage in with a little water for 30 seconds or so, and then rinse well while squeezing the water out. Works great for me. Pads come out like new. The only thing this won’t work on (or anything will work on AFIK) is with BFWD. NOTHING will get that out which I guess is a good thing from a paint protection standpoint. I just dedicate 1 or 2 pads to it and leave it at that.
Forgot to add, great article Ivan. Thanks.
Thanks all for the great comments. I have been celebrating my 27th birthday over the weekend so barely getting to the responses now, barely :).
Adam: I have tried snappy cleaner before and HATED it. It may have just been my bad luck, but after 2-3 pads would separate from their backing after each detail job, I just wrote it off as a bad method. I would do exactly as you described… fill a bucket with some warm water, dissolve the recommended (or less) amount of Snappy cleaner and let the pads sit in it for 10-20 minutes, take them out then rinse/massage under running water. Usually, while rubbing the pad under the water, I will be left with the pad in one hand and backing in the other! I can see your theory on the rotary ruining the backing, but at the same time I always had the pad come apart before it touched the rotary, so the rotary was never a deciding factor.
Wesley: I have tried the washing machine method before, and it worked fine but a couple pads did get damaged. I’m not sure if they were weak from before (use and/or washing) or if the machine did the damage, but I didn’t like the outcome. The machine heat and speed may also be variables that account for the damage caused to my pads but not yours. If it works for you though, it’s definitely a great method and beats washing it by hand, so I’d say keep at it for the final wash.
Adam: I have no idea whether or not the MF detergent will be to rough on the foam. Hopefully someone with experience can chime in.
Joel: As I said above, if it works for you that’s awesome! Keep doing what works but also always keep checking the pads and see if it might be damaging them. As for using 3-4 pads on a car, it sounds a bit low, but again, if it works then no reason to fix what isn’t broken. I will usually use double that on a regular sized sedan, which is why it seems a bit too low. Many people don’t realize how much paint has actually collected within the pad due to the paint being clear and invisible, so they keep working with a pad that’s not putting out the best possible result. Best way to find out when you need a new pad is to test a freshly washed pad against one that has been used on a couple panels already. What I do many times, when I feel that I can still do a few sections with a pad I’ve already used a bit, I will do a side by side test spot, using the old pad and a fresh pad. This way you can easily see the difference between the used and new pad and whether you should switch now or after a couple more sections. Every car is different and paint condition plays a big role, but I believe you should do this sort of test on every detail job in order to get the most out of each pad you’re using. As I said though, you maybe getting 100% out of each pad and need not change anything, but it’s always good to experiment and know for sure.
Tom: I think that’s a great method and very similar to mine. I would just try out different amounts of Dawn and/or cut it with water so you’re not using more than necessary to properly clean the pads. I will have to try this myself and see how it compares to spraying the APC+ that I currently use. As for BFWD, I use the same method as above, but I do it a couple times and also wring out the pad while holding it in a yellow mf towel. This way I collect a lot of the leftover BFWD into the mf towel and it’s easily visible. Pad actually ends up being much cleaner after the wringing as opposed to just washing then drying.
Thanks again for all the comments guys. Keep those pads clean!
Ivan
Thanks again!
Thank you.
Ivan,
What about using Megs APC not the APC+ ? I assume this will work in the same manor?
thanks,
Joel.
Joel,
I would also assume it will work in the same manner and I wouldn’t hesitate to try it.
However, I have honestly never used APC for this purpose so I can’t say with 100% confidence it will work.
I think it’s safe to assume that it wouldn’t cause any damage, but might be a bit more or less efficient than APC+. Let us know how it goes if you do try it out. If I get some regular APC soon I’ll be sure to try it myself.
Ivan
I sometimes use micro restore, apc or ALL detergent (machine washing when I have too many). If I am on the fly, (on the job) then I will use APC+ in a bucket. Works just fine with the rest of the steps Ivan outlined!
Great article
While I’m buffing after I get done a panel (hood, roof, or 2 doors)
I use my fine tipped air nozzle to get all the crap outta the pads
I use the hydro tec pads so the ONR method above is out but I do use ONR if I’m using my other non hydro tec pads.
I have tried everything for cleaning pads. To be quite honest, snappy pad cleaner is the worst of all. The best that I have used is regular DAWN dish washing detergent. Massage….rinse, massage….rinse etc. Good article…thanks!
I just want to thank all of you for your comments about detailing ones car .i am relaitvely new to this but have always taken great care of my autos and now that i’m military retired from aircraft work for more than 21 yrs I wanted to know more about auto detailing and this sight is great. I was wondering just how in the heck was i going to clean my pads without buying some expensive devise that don’t always work and the advise about Dawn detergent was a great one because we would used Dawn on the helocopters when we really need to breakdown the Grease on the A/c. This method of washing the pad in dawn was great even tho i waited a week before i decided that i had to do something . My pads came out great and look new. I let them soak for about 10 min. and rinsed with hot water and they are drying as we speak So thanks to all your input really is appreciate in helping this old retired JARHEAD new tricks SEMPER FI!!!!
bought my first das6pro polisher 2 weeks ago. bought also sonus sfx3 &sfx2 pads. due to an unreal lack of info, i today tried sfx3 pad with menzerna sf 4000 having clayed the car (57 plate passat sel,in silver grey )in my ignorance,despite several requests for advice on this subject, i put 4 pea sized drops of sf4000 on my brand new,bone dry pad and got started,the result being,as you will understand,way under what i expected to acheive,the polish dried after a couple o f minutes,leaving the pad with a large area of dry polish on the pad centre!! hugely disappointed, since i expected a WOW shine did the bonnet only( thank god ),so i will now,thanks to your help, have another go, with higher expectations thank you archie
Thanks for the advise. I used the Dawn dish washing liquid method and it worked fast. hand squeezed a few times and rinsed they came out perfect in under 3 minuets. Thanks again.
I’ve used xmt pad cleaner on really dirty pads and put them in the washer weeks afterwards with some good success. Not my first plan of action but when your peaked out you do what you have too.
I’ve found Dawn works the best for compounds and polishes. However, I use Blackfire Wet Diamond as my LSP and can’t get it out of the pad no matter what I do. This goes for machine foam pads and microfiber hand applicator pads. I’ve tried Dawn (soaking for days), Snappy clean (did nothing), APC, washing machine…after cleaning I still always can squeeze sealant goop from the pad. Perhaps its a testimony to how durable the product is (doesn’t break down very easily). Perhaps I’m using too much product and shouldn’t be loading up the pads so much. But I still haven’t figured out how to get it out of the pads and applicators. Now I only apply by hand and discard the microfiber applicators because they are less expensive than the machine pads. Any ideas on how to get the sealant out of the pads?
Rob I experienced the same thing with BFWD sealant as well as others. My solution was to simply clean it up as much as possible and get a new pad every now and then (when I feel there may be hardened stuff in the pad that can hurt the finish). Another thing you may try is running the pad against a microfiber towel and pressing hard (may not be possible on a random orbital polisher) to get as much out as possible.
What can I use to prep a new pad what type of spray thanks
Ken – Check out this great article by Ivan Rajic – https://www.detailedimage.com/Ask-a-Pro/how-much-product-do-you-put-on-the-pad-do-you-prime-it/. If you have any other questions please do not hesitate to contact us here: https://www.detailedimage.com/Contact/
Cold water and washing machine with a little detergent works fine. Meguiars even says that you can dry their pads on a low heat in the dryer and I have done this and they come out great.
I think im going to go with the pad washer. I leave the pads soaking in the sink in pad cleaner but a lot of times I procrastinate on cleaning them by hand. I think it’s worth investing in the pad cleaner. I’ve heard you can use them right after drying the spin of the DA works so good to dry them?
Cleaning your pad is an important step in polishing. There are a few things you need to know before cleaning it. A dirty or oily pad will make your car’s paint dull and streaky, so clean it after every use. Use water for light dirt and soap for heavy dirt. Rinse the pad thoroughly after washing it with soap. Air-dry the pads but not in direct sunlight because this can cause cracking or shrinkage.