Auto Detailing Guide - Polish

Why Polish Your Car? (Return to Top)
Polishing is the step in the detailing process that yields the most dramatic difference in your paint's appearance. The objective of polishing is to remove imperfections in the clear coat that cause the paint to look dull. Surface imperfections can include swirls, scratches, water spots, etchings, industrial fallout, oxidation, etc. These surface imperfections cause light to fragment instead of passing directly through the clear coat yielding less gloss and depth. When these imperfections are removed, you will reveal the true potential of your vehicle's paint.
A swirl mark is a very thin and shallow scratch on the surface of your paint, that often comes from washing and drying improperly. Waxes, sealants and most glazes will not permanently remove these surface imperfections at best they will hide them temporarily. To eliminate these imperfections safely and permanently you want to polish the surface starting with a less aggressive polish and using more aggressive polishes as needed. The chemical polishing agents and/or the polishing particles will safely remove the extremely fine imperfections.
When To Polish Your Car (Return to Top)
We recommend only polishing as needed, which is typically around one to two times per year during a full detail. After a thorough multiple step polishing process has been completed you can maintain the finish properly using the correct washing and drying products and techniques. Keeping the paint in good condition will ensure it needs less frequent polishing.
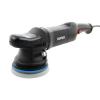
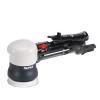
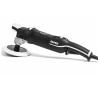
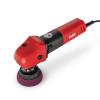
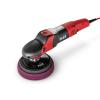
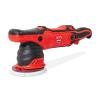
Why Use a Buffer? (Return to Top)
While you can polish by hand, it is highly recommended to use a quality buffer for maximum results. When you remove imperfections in your paint, you are working in polishing particles thoroughly and evenly. To do this by hand, you need to use a fair amount of pressure while moving the pad rather quickly. To put it in perspective, the standard in the industry for buffers is the Porter Cable 7424 XP. This buffer can generate 6,800 oscillations per minute at full speed very safely and effectively. Imagine trying to move your arm 6,800 times per minute for hours on end, all while exerting 10 - 15 lbs of pressure on the applicator pad. It's impossible to duplicate by hand and it can be tiresome to do a small fraction of this work by hand.
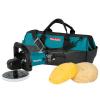
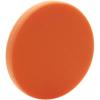
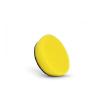
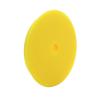
Another main advantage of a buffer is its ability to work with various pads that help increase the polishing power. For example a blue pad is extremely soft so it's used for extremely fine polishes, but if you use an orange pad it's more dense and can work in a medium cutting polish extremely well. Best of all these pads all use the same hook and loop backing so you simply slap them on and pull them off with ease and no tools are needed. Below we will outline some of the most popular buffers for detailers and what pads and polishes they work great with. There is no one best buffer and there is no one best combination of pad and polishes, however our recommendations come from years of experience and consistently yield excellent results.
To see a comparison of the technical specifications between buffers please check out our Buffer Comparison Chart below.
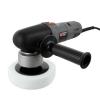
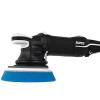
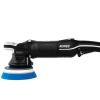
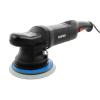
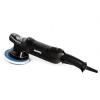
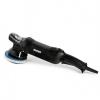
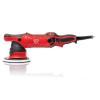
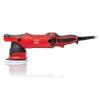
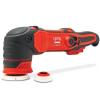
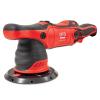
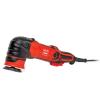
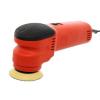
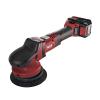
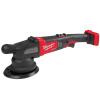
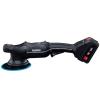
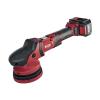
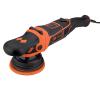
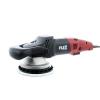
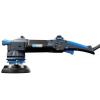
Buffer Comparison Chart
| Buffer | Type | Speed Dial | Comes With | Specifications | Compatible Backing Plates & Pads |
|
Random orbital |
|
|
|
|
|
Random orbital | 3,000 RPM - 4,500 RPM | Built in 6" backing plate |
|
|
|
Random orbital | 3,000 RPM - 5,200 RPM | Built in 5" backing plate |
|
|
|
Random orbital | 2,500 RPM - 4,700 RPM | Built in 6" backing plate |
|
|
|
Random orbital | 2,500 RPM - 5,300 RPM | Built in 5" backing plate |
|
|
|
Random orbital | 4,000 RPM - 5,500 RPM |
|
|
|
|
Random orbital | 4,000 RPM - 5,500 RPM |
|
|
|
|
Random orbital | 0 - 11,000 RPM |
|
|
|
|
Random orbital | 2,000 RPM - 4,200 RPM |
|
|
|
|
Random orbital | 2,000 RPM - 5,200 RPM |
|
|
|

|
Random orbital | 3,000 RPM -5,500 RPM |
Available in two kit options:
|
|
|
|
Random orbital | 2,000 OPM - 6,400 OPM |
|
|
|
|
Random orbital | 2,000 OPM - 6,400 OPM |
|
|
|

|
Random orbital | 3,000 - 7,000 OPM |
|
|
|
|
Random orbital | 2,000 - 6,400 OPM |
|
|
|
|
Random orbital | 2,000 - 6,400 OPM |
|
|
|
|
Random orbital | 2,000 - 6,400 OPM |
|
|
|
|
Random orbital | 3,500 - 10,000 OPM | 3" DA backing plate included |
|
|
|
Random orbital | 4,600 - 7,600 OPM |
|
|
|
|
Random orbital | 2,650 - 5,100 RPM |
|
|
|

|
Random orbital | 2,400 - 4,500 RPM |
|
|
|

|
Random orbital | 3,000 - 5,200 RPM |
Available as a kit:
|
|
|
|
Random orbital | 3,000 - 4,500 RPM |
Available as a kit:
|
|
|

|
Forced rotation | 2,900 - 8,600 OPM |
|
|
|
|
Forced rotation | 4,600 - 7,600 OPM |
|
|
|
|
Forced rotation | 150 - 350 OPM |
|
|
|
|
Forced random orbital |
|
|
|
|
|
Rotary & Random orbital | 2,000 RPM - 5,000 RPM |
|
|
|
|
Rotary & Random orbital | 900 - 3,600 OPM |
|
|
|
|
Rotary | 600 - 2,100 RPM | Side handle included |
|
|
|
Rotary |
|
|
|
|
|
Rotary | 1,300 - 3,900 RPM |
|
|
|
|
Rotary | 800 - 2,500 RPM |
|
|
|
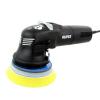
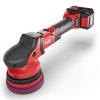
Random Orbital Polisher
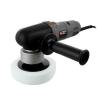
Random orbital polishers are great for both experienced professionals and first time users. Many of these buffers are very affordable, so you can get a quality tool that will last for years. It is also incredibly easy and safe to use so brand new users can expect excellent results with their first detail. Random orbital buffers oscillate rather than spin. This helps reduce the amount of heat generated on the paint and is very safe to use. Even at full speed, the risk of damaging your paint is virtually zero.
Pros:- Many affordable and high quality options available
- Very safe to use at any speed
- Easy to control and maneuver
- Can be used with almost any hook and loop pad
- Can not remove some scratches and deeper imperfections
Product Recommendations
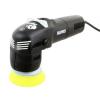
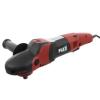
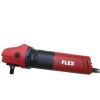
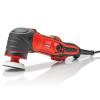
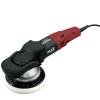
Forced Random Orbital Polisher
The Flex XC3401VRG dual action buffer uses a revolutionary design that really changed detailing when it was first released. Forced random orbital polishers like the XC3401VRG have the ability to correct imperfections nearly as fast a rotary buffer, but are totally safe to use and you won't burn the paint with them. The Flex is a true dual action buffer, meaning it oscillates as well as utilizes forced rotation. This creates even more power while keeping it safe and easy to use. It has plenty of polishing power to remove many surface imperfections quickly and effectively. The ergonomics of the buffer and unique features make it easy to operate, even for first time buffer users.
Pros:- Fast correction of swirls, scratches, water spots, oxidation and more
- Powerful motor that will not bog down under pressure
- Up to 9,600 OPM and 480 RPM at full speed
- Variable speed trigger allows you to reduce the speed on the fly
- Professional like results nearly every time you polish
- Can be used to apply a compound, polish, glaze, sealant or wax
- Up front cost of the buffer
Product Recommendations
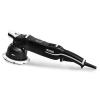
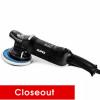
Rotary Buffer
Rotary buffers are perfect for the high end detailing enthusiast or professional detailer. Rotary buffers can correct paint imperfections faster than random orbital or dual action buffers, however, they take lot of practice to master and have a higher risk of damaging the paint when used incorrectly.
Pros:- Fast correction of swirls, scratches, water spots, oxidation and more
- Slow starting RPM speed of 600 on some models
- Not recommended for beginner detailers due to the risk of damaging the paint
Product Recommendations

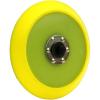
Choosing a Backing Plate (Return to Top)
Every buffer requires some form of a backing plate that allows you to attach pads to the buffer. Each buffer may have a different requirement for what type of backing plate is needed so make sure you get the correct one. The backing plate may come pre-assembled but many will screw in or otherwise attach to the buffer. It will stay there no matter what type of pad you use as long as it's the same size. The face of the backing plate is hook and loop (similar to Velcro) which very easily attaches to the back of the hook and loop pads. You simply just center the pad on the backing plate and press it down securely and you are done.
To determine what backing plates are compatible with your buffer, see the Compatible Backing Plates & Pads section of our Buffer Comparison Chart above. If you are not sure what size backing plate to get please see the Smaller vs Larger section below.
Hand Polishing (Return to Top)
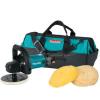
As previously stated a buffer is generally more effective at applying a polish or compound because it can provide more passes and pressure than a normal hand application. The added pressure and passes will work the polish in more thoroughly and effectively removing more of the surface imperfections. However, if you are not able to use a buffer you can still apply polishes by hand and make you're vehicle look noticeably better. Hand applications are generally completed with one of two methods. The traditional method is a generic hand applicator usually made of foam or microfiber. Another option is to use a product like the Polishing Pal and Lake Country four inch pads to work in the polishes.
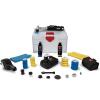
The Polishing Pal is a huge help for those who prefer a hand application because of two main advantages over a traditional hand application. The Polishing Pal makes it is easier to distribute the pressure through the entire four inch pad instead of just where your finger tips press. Secondly you can use any of the four inch pads from Lake Country which are a huge help with the polishing process. For example you will get more polishing power with an orange four inch pad and the Polishing Pal versus the same application with a traditional foam applicator. The Polishing Pal can be used with various pads so you use it to apply any compound, polish, glaze, sealant and wax. Many detailers believe the Polishing Pal feels more comfortable to work with and less tiresome.
Product Recommendations
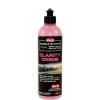
Choosing Polishes (Return to Top)
With so many polish options available, it can be difficult to choose which product will work best for your needs. Each polish has their pros and cons, while a few excel in almost everything. Polishes can vary from a non-abrasive chemical cleaner to a very abrasive compound. The overall objective of polishing is to rid the surface of imperfections. In an ideal world, you would always use the least aggressive polish and pad combination to get the results you are looking for. The problem with going this route is it can be very time consuming to test lots of polish and pad combinations and it can be costly to stock up on multiple polish and pad combinations. As you become more experienced, you will be able to assess your paint and have a good idea what level polish you will need.
As a detailing enthusiast, it is recommended to have at least one polish of each level on hand to tackle any type of imperfection that may come your way. Listed below are the various types of polishes and what each polish is typically used for.
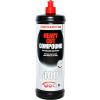
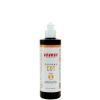
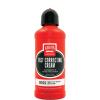
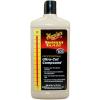
Compounds
Compounds are the most aggressive type of polish and should be used only as needed. Compounds are commonly used on severely neglected vehicles and to clean up wet sanding marks. Compounds will almost always leave behind some marring, hazing, or holograms and should always be followed up with a finer polish and pad combination.
Product Recommendations
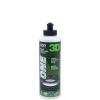
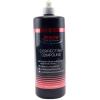
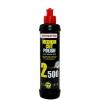
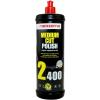
Cutting Polishes
Most polishes that correct moderate paint imperfections fall into the category of a cutting polish. They are less aggressive than compounds in terms of cutting power and usually do not finish down as well as a finishing polish. On most paint, it is recommended to follow up a cutting polish with a finishing polish to remove any micro-marring, hazing or holograms as well as increase the depth and gloss. Some cutting polishes are capable of finishing down very nicely on certain paint finishes, but to be safe we recommend a light pad and polish be used afterward.
Product Recommendations
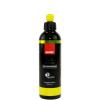

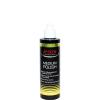
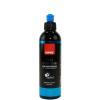
Finishing Polishes
The point of most finishing polishes is to remove very minor imperfections in the paint, such as micro-marring, hazing and holograms. Finishing polishes typically will not remove imperfections deeper than a very light swirl. They are also used to burnish the paint to achieve an exceptional level of gloss and depth.
Product Recommendations
All-In-One
All-In-One polishes are products intended to not only clean the surface, but add gloss and protection to the paint all in one step. Typically you can only remove very light imperfections in the paint, so these are great as a one step polish option, or at the end of a two or three step polishing process. These types of polishes combine detailing steps, to greatly save time and overall effort.
Product Recommendations

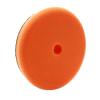
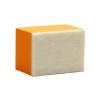
Choosing Pads (Return to Top)
When it comes to selecting the proper pad for polishing, you want to always make sure you take a few things into account:
- What polisher are you using? Some pads are designed with certain polishers in mind.
- What size is your backing plate? Check the size of the backing plate on your unit.
- What size pads do you want to use? For example, if the answer to the question above was 5", make sure you choose 5" - 6" pads. If you want to use something smaller or larger, pick up a different size backing plate first. You never want to use a pad smaller than the backing plate you are using.
- What are you trying to achieve? Match the aggressiveness of the polish with the aggressiveness of the pad?
A mismatched pad size, aggressiveness combination, etc. can create unnecessary work while wasting your time and product, so take the time to ensure you have the right pad and polish for the job. Below are all of the pad types we carry with some highlights of each!
Pad Types
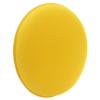
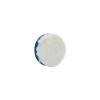
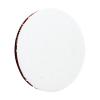
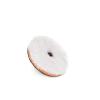
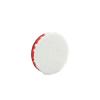
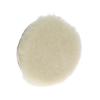
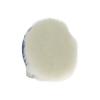
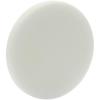
Foam Pads
A Foam Pad is a pad that is produced with a cellular structure (can be either open or closed cell), used in paint correction or to apply protectants or cleaners to a surface. These pads come in various styles, made by different manufacturers, each designed for different polishing steps or use with different polishers. Take a look at the list below for all of our foam pad offerings.
- Flat (i.e. Lake Country) - All-around pad with a flat smooth face, great for use on various polishers.
- CCS - Feature a group of closed foam cells on the surface of the pad, which do not absorb polishes or waxes. Instead, they gradually release these products, providing you with a longer work time.
- HDO - Beveled at a 70-degree angle and use of thinner foam and center hold to reduce heat. Designed for use on larger throw polishers.
- Force - Super dense foam designed to keep polish on the surface (face) of the pad. Formulated with forced rotation polishers in mind.
- Rupes (Flat) - Super durable open-cell foam designed to be used with Rupes polishers and polishes for the best results. Beveled with the front of pad an inch larger than backing.
- Rupes (Mille) - Fine pore structure formulated for use with their Rupes Mille Gear Driven polisher and Mille polishes. Thinner profile when compared to their regular flat pads.
- Rupes (Rotary) - Open-cell foam that helps provide rotational stability and maintains airflow throughout the pad when using a rotary polisher.
- Meguiar's (Soft Buff) - Thin 17.5mm disc design allows for a lower operating temperature and a much smoother and easier feel through the machine. Great when used with your Meguair's polisher, or any other unit you may have.
- CarPro (Flash & Gloss) - Made of reticulated polyurethane foam with a 7/8" thick design and beveled profile.
- Griot's Garage (BOSS Pads) - Ultra-firm euro foam with an 8mm thick (5/16"), low profile design.
- Chemical Guys (Hex-Logic) - Hex-logic grooves and center hole are designed to help reduce and disperse heat from the center of the pad.
- Buff & Shine (Uro-Tec) - Made with reticulated (open cell) euro foam of a higher density than traditional foam pads. This design is great for use with these long throw units.
- Buff & Shine (Low-Pro) - These pads are engineered with a rubber interface to help reduce heat and improve polishing results, especially on long throw polishers.
Product Recommendations

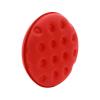
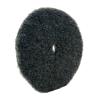
Microfiber Pads
Microfiber pads are a type of cutting and/or polishing pad made up of microfibers on the face. These fibers grab the paint less, which increases pad rotation. This higher rotation rate translates into increased defect removal making microfiber a great choice when looking to remove heavy imperfections. There are also some great light polishing options as well. Below are some of the microfiber pads we carry.
- Lake Country - Microfiber is packed into an 11mm thick pad backed with sturdy foam. Comes in three corrective powers, cutting, light cutting and polishing.
- Meguiar's - Microfiber discs that work great within the Meguiar's microfiber system (with D300, D301, and D302) or individually.
- Rupes - These pads are packed with a short and dense microfiber pile, featuring high-quality microfiber filament technology. They also feature various holes that help reduce heat while polishing.
- Griot's Garage - Two corrective options, one with a foam backing, the other without. Works great with your Griot's Garage polishers, or any other unit you may have.
- Buff & Shine - Two options, the Uro-Fiber and Uro-Fiber Finisher. Both feature a lower nap length, but the Uro-Fiber has two different aggression fibers. One will help remove imperfections while the other finishes down. The Uro-Fiber Finisher only features light finishing microfibers.
Product Recommendations
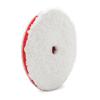
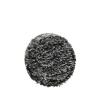
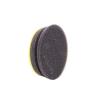
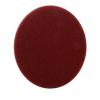
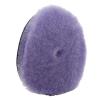
Wool Pads
Wool pads are made from a natural or synthetic material typically used to produce a polishing pad for aggressive defect removal, especially when using a rotary machine. Take a look at the list below for some of the wool pads we carry.
- Lake Country - A few different options, some with a foam backing and other without. Works best when paired with a heavy cutting polish, targeting heavy imperfections.
- Rupes - The pads were designed with the LH19E Rotary unit in mind but can be used with other rotary or DA units. These pads help remove heavy imperfections while running cooler during the polishing process.
- Buff & Shine - These pads use 100% soft, processed wool and the individual fibers are knitted onto the pad, not twisted.
Product Recommendations

Miscellaneous
Below are a few other polishing options you cannot forget, by glass and hand polishing. With glass being incredibly hard, we recommend using glass polishing discs and a glass specific polish (i.e. CarPro Ceriglass). For hand polishing, the 4" Foam Pads fit perfectly on the Polishing Pal. Polishing by hand is a lot of work, but this combo makes for great spot polishing and/or protection applications.
- Hand (Polishing Pal + Foam Pads)
- Glass (Lake Country Glass Polishing Discs)
Product Recommendations
Smaller vs Larger
Different pad sizes can have an impact on how well the buffer works in a polish, control, maneuverability, and how fast you can cover an area.
Smaller pads, in general, will offer you more control with any buffer. Smaller pads also make it easier to maneuver buffers in tighter areas, around corners and closer to trim pieces. On the downside, a smaller pad will fill up with product faster than a larger pad. For maximum results, especially when polishing, it's best to swap the pads out for fresh ones more frequently, especially with the smaller pads. We recommend changing the pad out for a fresh one every couple panels, so you may use 4 - 6 pads per coat. In general, the fresher the pad, the better the results.
Larger pads can cover a larger surface area in less time. This is particularly helpful with a sealant or wax which only needs to be spread nice and thin. We recommend using 2 - 4 pads per coat so you get maximum results while polishing. The downside to this larger surface area is that it's slightly less effective when trying to thoroughly work in a polish.
With random orbital buffers, such as the Porter Cable 7424 XP, the smaller the pad, the more effective you'll be able to work in polishes. This is due to the fact that you are concentrating more of the buffers energy over a smaller area. Larger pads on a random orbital do not break down polishes as effectively as smaller pads because the energy is distributed over a larger area.
With a rotary buffer, the opposite holds true. Smaller pads offer less polishing power versus a larger pad. On a rotary buffer, the outer edge of the pad is spinning the fastest. The larger the pad is, the more cut you are going to get out of a rotary buffer. This can correct imperfections faster than smaller pads, however, the risk of leaving behind hazing or holograms is much higher with larger pads on a rotary buffer.
There is no one right size pad, it just depends on your specific goals and the buffer you choose. In general, if we have to pick one size we recommend the 5.5" pads as they are a nice happy medium. The 5.5" pads provide enough corrective power while covering plenty of surface area to complete the detail in a timely manner.
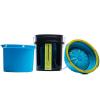
Pad Cleaning and Storage
As you progress through your polishing process, your pads will become saturated with polishing product and clearcoat removed from the surface. Because of this, you want to make sure you are using 4-6 pads per polishing step and to clean your pads during use. Swapping out pads and cleaning often will not only help increase your polishing results, but it will prolong the life of your pads. After you are done polishing, clean your pads thoroughly and let them air dry completely. Once dry, store in an open bag and in a closet, drawer, etc. Keep the bag open (i.e. DI Accessories Recloseable Storage Bag) so that you do not lock in any moisture during storage.
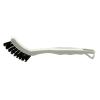
Foam Pads - We have three options that we like, two for cleaning during the polishing process and one after. If you are looking to clean during polishing we recommend using either a foam pad cleaning brush or pad washer. If you clean with a foam pad cleaning brush, we recommend flipping the pad over and brushing the face of the pad with the brush. This helps remove any polish and clearcoat on the face of the pad without using any water. It does not, however, remove any soaked up product, so we still recommend swapping out your pads as much as possible when using this cleaning method.
If you are using a pad washer, once you are all set up (water and pad washer), submerge the pad in water and against the grate and turn your unit on. This will spin the pad across the grate and remove polish and clear coat leaving it in the water. Back the pad out of the water and off the grate and continue to spin until dry.
One of our favorite cleaning processes, however, is to clean at the end. Leave a bucket with water and pad cleaning solution to the side and toss pads in after every panel. This lets them soak, not allowing any polish to dry in the pad. After you are done polishing, take your bucket of pads and rinse them under running water, using a cleaner to help remove any excess polish.
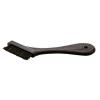
Microfiber Pads - These pads have a tendency to mat down during polishing, so it is very important to clean often while in use, along with one final cleaning at the end. To clean, simply use compressed air to blow the pads clean, keep them dry and lower temperature all at once. If you do not have access to compressed air, a pad cleaning brush will do the trick as well.
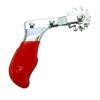
Wool Pads - Just like microfiber pads, wool pads can mat down during use. To clean we recommend a combination of compressed air, along with a pad cleaning spur. Both work great to keep the pads clean, cool and lasting longer during the polishing process. After you are done polishing, use the spur or compressed air again, or a pad washer for one final cleaning before storage.
Product Recommendations
How To Polish (Return to Top)
Properly polishing your paint to remove imperfections can take lots of practice to master, but if you follow these steps as closely as possible, you'll get the best results in the shortest amount of time. Before you polish your vehicle, the paint should already be washed and clayed for maximum results.
Proper Lighting
In order to know if you are getting the results you are looking for when polishing, it is extremely important to invest in quality lighting. One of the most cost effective light sources you can purchase is a Scangrip light. Using the proper lighting will reveal imperfections in your paint and give you a clear understanding if the polishing combination you selected is going to give you the results you'll be looking for.
Taping
To help reduce the risk of damaging any part of your vehicle, it is best to tape off the areas you want to protect. By properly taping, it also allows you to get as close to trim pieces as possible without damaging them. There are many quality options on the market but we recommend the 3M Automotive Performance Masking Tape. This will release easily from your paint with little to no residue left behind and is easy to clean up. We recommend taping off any area you do not want to polish or get any product on. Common areas to tape are your trim pieces, around emblems, headlights, tail lights, around clear bras, and more. When in doubt, tape it up, it's better to prevent a problem than to create one.
Random Orbital Polisher
- Step 1: Attach the appropriate backing plate to the buffer
- Step 2: Center your pad on the backing plate
- Step 3: Apply several pea sized drops of polish on the outer edge of the pad (apply a few extra drops to a fresh pad
- Step 4: Visualize your working area, starting with a small 12" x 12" box on a horizontal surface
- Step 5: Trace your working area with the polish on your pad with the buffer off
- Step 6: Turn the buffer on a low speed setting (1 - 3 on a Porter Cable 7424 XP) and spread the polish evenly through the entire 12" x 12" working area
- Step 7: Turn the speed dial of the buffer up (5 or 6 on a Porter Cable 7424 XP) and start in a corner of your 12" x 12" working area
- Step 8: Begin to apply roughly 15 - 20 lbs of pressure on the head of the buffer
- Step 9: Working from one corner to the next, move the buffer at a pace of 1" per second while exerting the 15 - 20 lbs of pressure
- Step 10: Once you reach the opposite corner, follow the same path back to where you started, but overlap your first pass by approximately 50%
- Step 11: Continue this pattern until you have polished your entire 12" x 12" working area
- Step 12: Polish the area again, but this time use the opposite direction (if you were working top to bottom then bottom to top the first time around, change it to left to right and right to left overlapping movements)
- Step 13: Polish the area the same as you did the first time, but this time use slightly less pressure
- Step 14: If the polish is broken down (usually looks like a clear milky haze), shut the buffer off
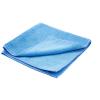
- Step 15: Using a clean microfiber towel, remove the broken down polish from the paint
- Step 16: Assess your work with your light source to ensure you have achieved the results you were looking for
- Step 17: Repeat steps 3 through 16 until the entire vehicle has been polished
Note: After every couple of panels, replace your pad with a fresh one for maximum results. If you are working with a limited number of pads, clean out the pad after every few sections using a medium bristled toothbrush and the buffer on a low speed (do this away from the car as it can potentially dust quite a bit).
Product Recommendations

Forced Random Orbital Polisher
- Step 1: Center your pad on the backing plate of your buffer
- Step 2: Apply several pea sized drops of polish on the outer edge of the pad (apply a few extra drops to a fresh pad
- Step 3: Visualize your working area, starting with a small 12" x 12" box on a horizontal surface
- Step 4: Trace your working area with the polish on your pad with the buffer off
- Step 5: Set the speed dial to your desired working speed (between 4 and 6 is recommended for the Flex XC 3401 VRG)
- Step 6: Using the variable speed trigger, spread the product around your 12" x 12" working area at a low speed
- Step 7: Starting in one corner of your working area, pull the trigger to full speed and lock in your speed
- Step 8: Begin to apply roughly 15 - 20 lbs of pressure on the head of the buffer
- Step 9: Working from one corner to the next, move the buffer at a pace of 1" - 2" per second while exerting the 15 - 20 lbs of pressure
- Step 10: Once you reach the opposite corner, follow the same path back to where you started, but overlap your first pass by approximately 50%
- Step 11: Continue this pattern until you have polished your entire 12" x 12" working area
- Step 12: Polish the area again, but this time use the opposite direction (if you were working top to bottom then bottom to top the first time around, change it to left to right and right to left overlapping movements)
- Step 13: Polish the area the same as you did the first time, but this time use slightly less pressure
- Step 14: If the polish is broken down (usually looks like a clear milky haze), shut the buffer off
- Step 15: Using a clean microfiber towel, remove the broken down polish from the paint
- Step 16: Assess your work with your light source to ensure you have achieved the results you were looking for
- Step 17: Repeat steps 2 through 16 until the entire vehicle has been polished
Note: After every couple of panels, replace your pad with a fresh one for maximum results. If you are working with a limited number of pads, clean out the pad after every few sections using a medium bristled toothbrush and the buffer on a low speed (do this away from the car as it can potentially dust quite a bit).
Product Recommendations
Rotary Buffer
- Step 1: Attach the appropriate backing plate to the buffer
- Step 2: Center your pad on the backing plate
- Step 3: Apply several pea sized drops of polish on the outer edge of the pad (apply a few extra drops to a fresh pad
- Step 4: Visualize your working area, starting with a small 12" x 12" box on a horizontal surface
- Step 5: Trace your working area with the polish on your pad with the buffer off
- Step 6: Turn the buffer on the lowest speed setting and spread the polish evenly through the entire 12" x 12" working area
- Step 7: Turn the speed dial of the buffer up to a comfortable working speed (between 1000 - 1500 RPMs is common)
- Step 8: Very little pressure is needed when using a rotary buffer, try to use just a hair more than the weight of the buffer
- Step 9: Working from one corner to the next, move the buffer at a pace of 2" - 3" per second while making sure you always keep the buffer moving
- Step 10: Once you reach the opposite corner, follow the same path back to where you started, but overlap your first pass by approximately 50%
- Step 11: Continue this pattern until you have polished your entire 12" x 12" working area
- Step 12: Polish the area again, but this time use the opposite direction (if you were working top to bottom then bottom to top the first time around, change it to left to right and right to left overlapping movements)
- Step 13: Polish the area the same as you did the first time, but this time use even less pressure
- Step 14: If the polish is broken down (usually looks like a clear milky haze), shut the buffer off
- Step 15: Using a clean microfiber towel, remove the broken down polish from the paint
- Step 16: Assess your work with your light source to ensure you have achieved the results you were looking for
- Step 17: Repeat steps 3 through 16 until the entire vehicle has been polished
Note: After every couple of panels, replace your pad with a fresh one for maximum results. If you are working with a limited number of pads, clean out the pad after every few sections using a medium bristled toothbrush and the buffer on a low speed (do this away from the car as it can potentially dust quite a bit).
Product Recommendations
Hand Polishing
- Step 1: If you are using the Polishing Pal select the desired pad and center it on the Polishing Pal
- Step 2: Apply a few pea sized drops of polish to the face of a clean pad (when the pad is new you can apply a few extra drops)
- Step 3: Spread the product over a 18" x 18" area or less with extremely light pressure to distribute the product evenly
- Step 4: Work the polish in with medium to firm pressure in a circular motion
- Step 5: Overlap each pass by 50% working left to right and then up and down
- Step 6: Remove the excess product immediately or within a few minutes with a clean microfiber towel
- Step 7: Assess your work with your light source to ensure you have achieved the results you were looking for
- Step 8: Repeat steps 1 through 7 until the entire vehicle has been polished
Upon completion the paint should have less swirls, oxidation and other surface imperfections. With a more optically clear surface you will now get a deeper gloss and a better shine. Additionally your sealant or wax used afterward will bond to this cleaner and smoother surface better so you can expect increased durability from the protection.
Product Recommendations
Facts and Tips (Return to Top)
- The smaller the section you work in, the better your results will be
- Do not rush the polishing process, it is very time consuming but the results are worth it
- When using a random orbital or dual action buffer, apply roughly 15 - 20 lbs of pressure
- Always match the aggressiveness of the product with the aggressiveness of the pad
- Swap out your pad for a fresh one every couple of panels for maximum results
- Keep a bucket of water and Snappy Clean solution by your side to soak your pads as soon as you are done
- Using the proper lighting when polishing is important to assess your results accurately
- Smaller pads offer you more control and can get in tighter areas
- Larger pads can spread products quickly, which is great when applying a sealant
- Rotary buffers should be used by experienced detailers and professionals
- Tape off your trim, glass, and any other area you do not want polish to potentially damage
- Use 3 pea sized drops of polish per working area, many detailers use too much product
Related Articles (Return to Top)
Here are a few articles related to Polishing from our Ask-a-Pro Detailer Blog:
- Polishing How to With Meguiar's m105 & m205
- Tutorial: How to Prep a Car for Polishing
- Polishing With the 4 Spot Pad for Better Results
- 1 Step, 2 Step, The various Types of Polishing Process
- How Much Polish Should I Use on My Pad
- Assessing Paint Condition and Deciding on a Correction Process
- Polishing Pads: How Many Should I Use?
- 3 Questions You Should be Asking EVERY Correction and Coating Client
- Do I Need To Polish A Brand New Car?
- Pad Cleaning During and After Polishing
- The 5 Key Elements to Proper and Effective Paint Polishing
- 3 Dual Action (DA) Polishing Tips: From Newbie to Pro
- Clear Coat Preservation: Are You Polishing Too Often?
Related Videos (Return to Top)
Ask-a-Pro Blog author James Melfi explains where paint swirls and scratches come from in the first video below. In the second video, James shows you how to properly polish your car paint.
What's Next? (Return to Top)
After polishing your paint to your liking, the clear coat is more optically clear and you'll get a much deeper reflection. It should look more vibrant and feel smoother to the touch. After that, your next step could be to use a glaze, sealant or wax. These products will help enhance the appearance of the surface and the sealant and wax can protect it.